
 로그인


Wet sanding is often recommended as the cleaner, better-finishing alternative to dry sanding. That advice leaves out half the job: water doesn't eliminate sanding residue, it turns much of it into slurry that you still have to collect and dispose of. Meanwhile, dry sanding with effective extraction can control dust without creating a wastewater problem.
The useful question in wet sanding vs dry sanding isn't which method wins outright. It's which combination of abrasive, dust control, inspection and cleanup fits the material and the stage of work.
Table of Contents
- Wet vs Dry Sanding at a Glance
- How Each Method Changes the Finish
- Dust Exposure and Health Risk Compared
- Materials and Silica Where Each Method Fits
- Abrasives That Match Each Method
- Cleanup and Wastewater Each Method Creates
- Choose Your Sanding Method Before the First Pass
Wet vs Dry Sanding at a Glance
Dry sanding usually suits shaping and bulk removal; wet sanding suits controlled refinement on water-compatible surfaces. Neither method wins on finish, speed, exposure and cleanup simultaneously.
Dry sanding removes material through abrasive contact without added liquid. Wet sanding adds water as a lubricant and coolant, carrying loosened material away as slurry rather than leaving all of it loose at the sanding interface.
Wet vs dry sanding criteria at a glance
| Criterion | Wet sanding | Dry sanding |
|---|---|---|
| Best grit range | 600-2000 grit for refinement | 120-240 grit for bulk removal |
| Stock removal speed | Slower, controlled | Faster |
| Airborne dust | Much lower at the work surface | High without water or extraction |
| Finish and scratch pattern | Finer, more uniform | Coarser, deeper scratches more likely |
| Visual feedback while working | Water can hide defects | Clear view of progress |
| Abrasive requirement | Waterproof wet/dry sheets rated for liquid | Standard sheets with dust extraction |
| Cleanup burden | Slurry and water to collect and settle | Vacuum and wipe; dust to bag |
| Best use | Final leveling, dust nibs, pre-polish | Shaping, coating removal, bulk leveling |
The grit ranges are automotive preparation and refinement starting points, not universal instructions. Coating hardness, film thickness and the next operation determine the actual sequence. A clear coat correction and a filler repair shouldn't begin with the same abrasive just because both involve a car panel.
Read the table by task, not by winner
A smooth surface isn't necessarily a flat surface. Fine wet sanding can refine scratches while leaving underlying waves untouched, so finish quality alone doesn't establish whether the preparation is complete.
Material context matters just as much. For a renovation project, J.R. Hardwood Floor Refinishing & Cleaning's resource on how to restore scratched hardwood floors provides a more relevant starting point than transferring automotive clear coat methods directly to flooring.
Also distinguish uncontrolled dry sanding from source-captured dry sanding. Treating them as equivalent makes the comparison misleading before work even starts.
The key differentiator isn't simply water versus no water. It's where the residue goes, and whether your setup can contain it.
How Each Method Changes the Finish
A finish is built through successive corrections. First establish the shape, then remove the scratches left by that work, then prepare the surface for coating or polishing. Trying to achieve all three with a fine abrasive usually means spending longer without correcting the underlying defect.
The contrast between the sanding interfaces is illustrated below.
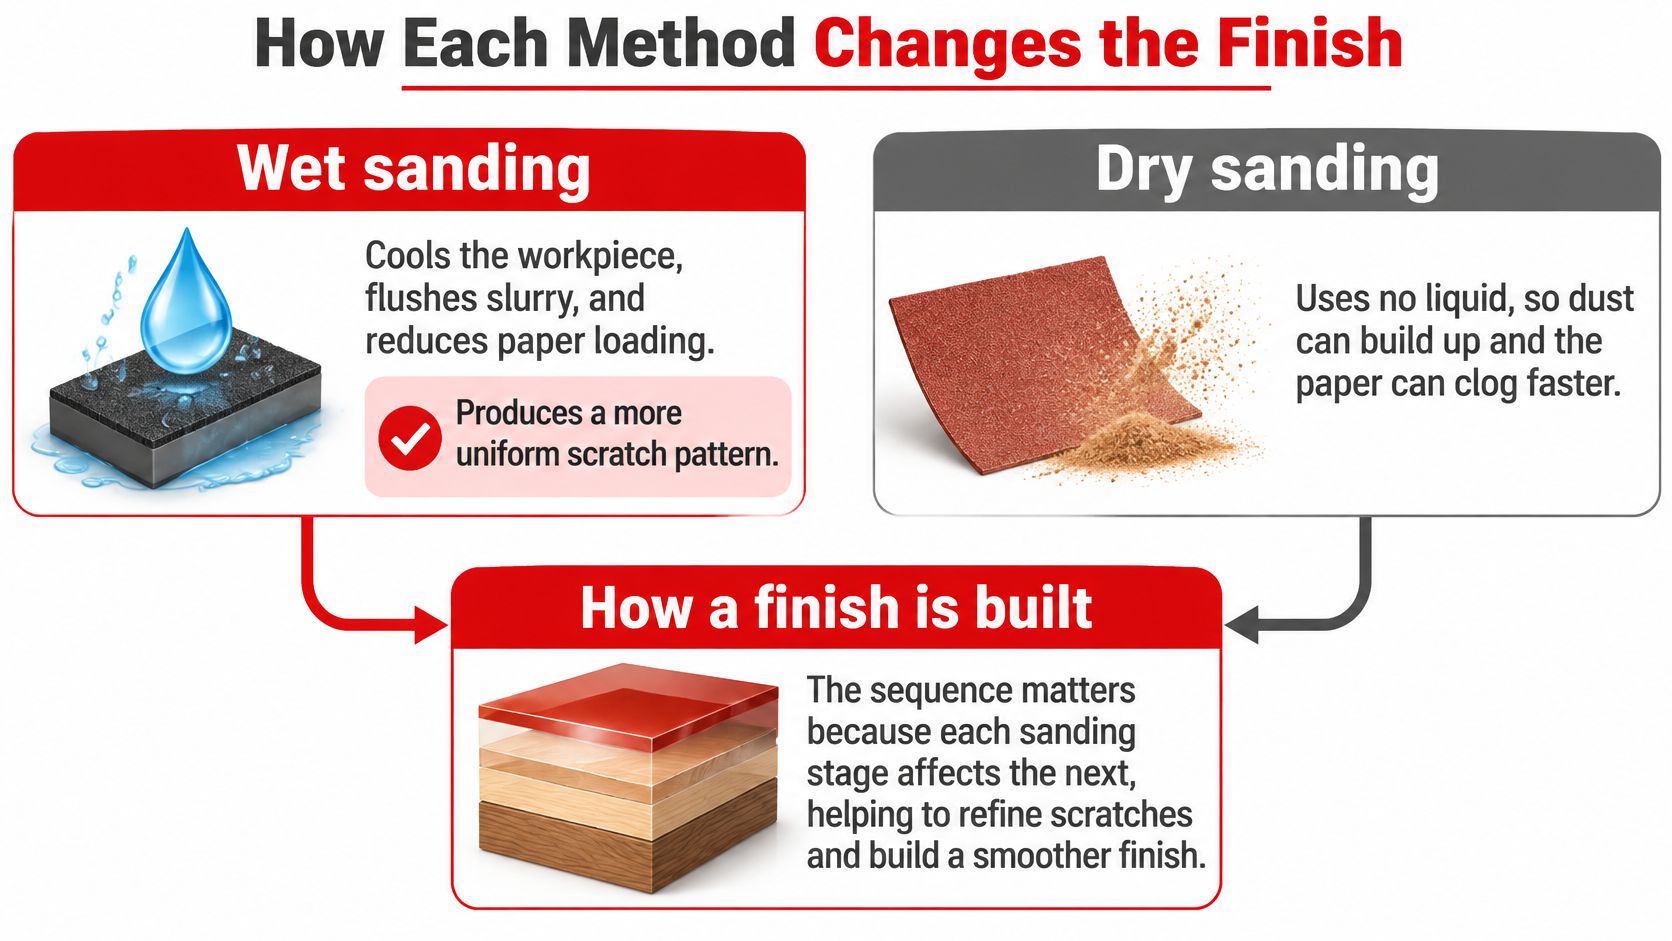
Paintman's automotive sanding guidance places dry preparation around 120-240 grit and wet refinement around 600-2000 grit, while emphasizing coating compatibility and the next process step. Those ranges describe different jobs, not an instruction to jump directly from coarse shaping to final clear coat refinement.
Build the finish in controlled stages
- Flatten bulk high spots dry. On suitable filler or primer, use a sanding block and a preparation abrasive that removes material efficiently. The block spreads pressure across the panel. The common mistake is using fingertips on a broad surface, which can create localized low spots.
- Check flatness under raking light and mark remaining low areas. Inspect the shape before chasing a finer appearance. The mistake to avoid is assuming that smoothness proves flatness; a panel can feel smooth and still look wavy.
- Switch to wet refinement only when appropriate. On a compatible, sufficiently cured coating, use a block, light pressure and uniform lubrication. Remove the previous scratch pattern progressively rather than making an oversized grit jump. Heavy pressure is the main error here, especially on thin coatings and edges.
- Wipe the surface with a clean cloth and inspect it without the glossy water film. Look for isolated deep scratches, remaining nibs and uneven texture. The common mistake is judging the surface while it's still wet, when defects can be harder to see.
For disc-based preparation, our guide to using sanding discs helps connect abrasive selection with handling and surface control.
This video offers an additional visual reference for the sanding process.
For cured clear coat, the target before polishing is a uniform haze without isolated deep scratches, not finished gloss. Once polished, the reflection should be consistent. Primer preparation has a different endpoint: an even, compatible scratch profile for the next coating, rather than a surface polished for appearance.
Dust Exposure and Health Risk Compared
Respirable dust consists of particles small enough to penetrate into the lungs. Thoracic dust can enter the respiratory system below the throat. These distinctions matter because the dust you can see isn't a complete measure of what reaches your breathing zone.
In a 2009 NIOSH laboratory study, 16 participants performed simulated drywall-finishing tasks using a block sander, wet sponge, pole sander and ventilated sander. The reductions below are relative to the dry block-sander baseline in that study.
Dust reduction by sanding method versus dry block baseline
| Method | Respirable dust vs baseline | Thoracic dust vs baseline | What drives the result |
|---|---|---|---|
| Block sander (dry baseline) | Baseline, no reduction | Baseline, no reduction | No water or extraction |
| Wet sponge | 60% lower | 47% lower | Water captures and weighs down residue |
| Pole sander | 58% lower | 50% lower | Pole-sanding configuration; no water or extraction |
| Ventilated sander | 88% lower | 85% lower | Dust extracted at the tool |
The important finding isn't merely that the wet sponge reduced dust. Tool-mounted extraction outperformed wet sponging in this controlled comparison. That undermines the common assumption that adding water must be the strongest available exposure control.
The pole-sander result also needs careful interpretation. It describes the tested method and working configuration, not proof that a pole removes dust from the air. The table shouldn't be used to assign an untested capture mechanism to that tool.
What the comparison does and doesn't establish
Dry abrasion without capture leaves loose material available for dispersion around the worker. Wet sponging holds down part of that residue, while a ventilated tool removes dust near its point of generation. Both approaches are different from letting dust escape and trying to clean the room afterward.
However, these were simulated drywall-finishing tasks. Don't apply the percentages to concrete grinding, stone sanding or automotive clear coat correction. Substrate, abrasive, technique, ventilation and water management can all change exposure.
Abrasive selection remains part of the setup, but it isn't a substitute for exposure control. Our comparison of aluminum oxide and silicon carbide sandpaper addresses grain selection; the extraction and protective equipment still need to suit the material being removed.
Practical rule: If the task is dusty and water can't be used, capture dust at the tool and select a properly fitted respirator appropriate to the hazard. Don't use a respirator as permission to leave the source uncontrolled.
Less visible dust is useful evidence of better housekeeping, but it isn't proof of safe exposure. Keep other people outside the work area and prevent collected residue from being redistributed during cleanup.
Materials and Silica Where Each Method Fits
Start by identifying what you're sanding, including the coating, not just the substrate underneath it. Concrete, mortar, stone and ceramic can contain crystalline silica. Their dust-control requirements can outweigh any preference for speed or surface appearance.
The NIOSH drywall-sanding dust-control guidance identifies wet sponging and vacuum collection as principal controls for drywall-sanding dust. The practical lesson is to control particles where they're generated rather than relying primarily on respiratory protection after release.
For silica-generating work, select an appropriate wet method or local exhaust system and establish the applicable workplace requirements before starting. A household cleanup arrangement shouldn't be assumed suitable for a hazardous mineral-dust task.
Preferred sanding method by surface or task
| Surface or task | Preferred method | Reason |
|---|---|---|
| Cured clear coat, dust nibs, orange peel | Wet refinement within the coating-approved fine-grit sequence | Controlled correction with reduced abrasive loading |
| Body filler and primer bulk shaping | Dry preparation with extraction | Faster removal and clear visual progress |
| Drywall compound | Wet sponging or vacuum-attached dry sanding | Principal dust-control approaches identified in workplace guidance |
| Concrete, mortar, stone, ceramic | Suitable wet methods or local exhaust ventilation | These materials can contain crystalline silica |
| Paint and rust removal | Dry with extraction, then wet refinement only if compatible | Bulk removal and residue containment come first |
Similar-looking surfaces can require different controls
Ordinary drywall compound and silica-containing masonry shouldn't be treated as interchangeable dust hazards. Drywall work can still generate substantial dust even where silica isn't the controlling concern. Prolonged, very dusty sanding isn't made acceptable by describing the material as ordinary wall compound.
Likewise, wet sanding a cured automotive coating doesn't establish that water is appropriate for a porous repair beneath it. Check the coating system's technical instructions, especially where sanding may expose filler, bare metal or another water-sensitive layer.
For paint removal, identify the old coating before choosing a method. Capturing residue is only part of the problem if the removed material needs special handling.
The selection order is therefore material compatibility first, finishing stage second. Once a method is safe for the material and the work environment, choose the abrasive sequence that achieves the required shape or scratch profile.
Abrasives That Match Each Method
Two sheets can carry the same printed grit and cut nothing alike once water enters the process. Backing, resin bond and grain retention decide whether the abrasive holds a consistent scratch pattern or sheds grains and clogs within a few passes.
In Nanovea's sandpaper abrasion test, papers of the same nominal grit behaved differently under lubricated conditions, with one sample showing a wet coefficient of friction of 0.27 while another achieved a higher abrasion rate. The practical conclusion is narrower than "wet sanding is better": abrasive construction changes the outcome, and the grit label alone guarantees nothing across product lines.
Match the whole abrasive system
- Backing compatibility. Choose waterproof paper, film or another backing explicitly rated for the liquid application. Flexibility alone doesn't establish water resistance.
- Resin and grain retention. The bond needs to hold abrasive grains under the intended working conditions. A sheet that sheds or breaks down isn't providing a controlled refinement step.
- Grain selection. Match the abrasive to the coating or substrate and the required removal rate. Don't assume every grain type behaves identically at a matching nominal grit.
- Lubrication rating. Confirm wet, dry or wet-and-dry use on the actual accessory. A wet-rated sheet doesn't make an ordinary powered sander suitable for water.
Abrasive choice also decides which waste problem you end up managing. Wet-rated sheets demand a continuous lubricating film and frequent slurry removal just to inspect the cut, and every pass adds to a contaminated water stream that has to be contained and settled. Dry-rated sheets concentrate the debris at the tool face, where a vacuum attachment can capture it as it forms. A sheet that clogs quickly inflates the cost of either method, so judge it partly on the cleanup burden it creates.
Our guide to flap wheel mesh numbers and polishing requirements explains how abrasive grades map to the finish each one produces.
The assortment below illustrates the combination of sheets, a holder and contouring sponges used in hand preparation.
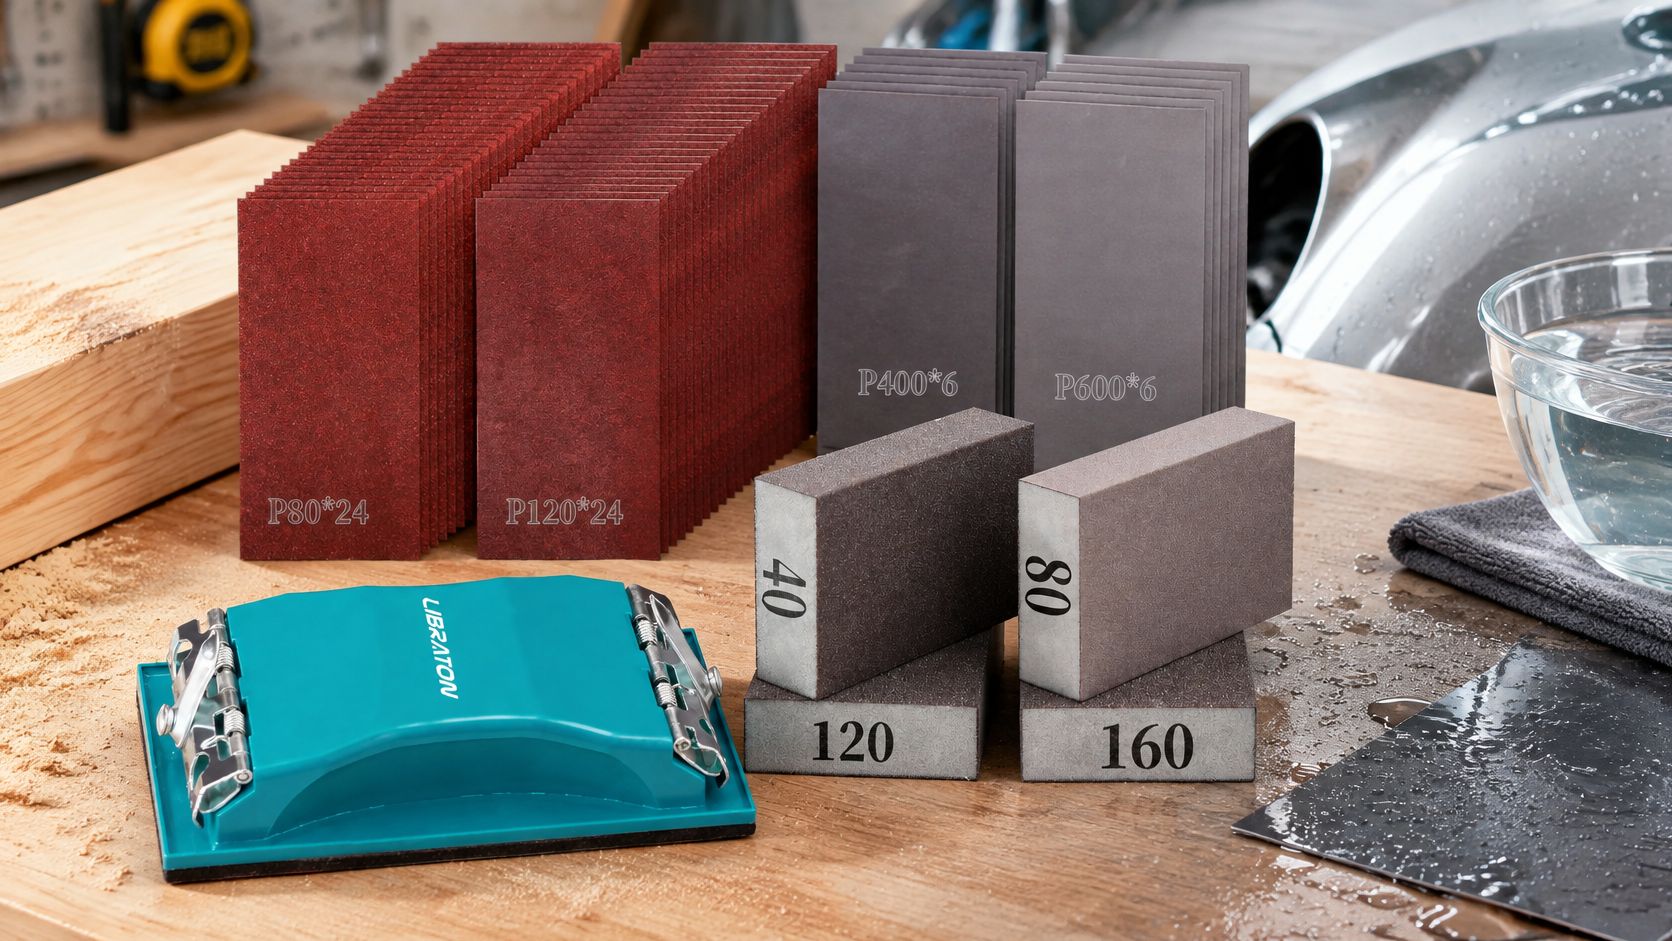
The Libraton 65PCS Sandpaper Assortment Kit with Sanding Block & Sponges bundles a 65-piece sandpaper assortment with a sanding block and sanding sponges, and it's priced at $16.99. Check the included grit range against your planned sequence before treating any assortment as a complete kit, since a preparation bundle and a full finishing sequence are different requirements.
Prove the combination on scrap first
Use scrap with the same coating and cure condition. Compare removal rate, scratch uniformity and the appearance after wiping dry, keeping the block and pressure as consistent as practical.
Judge the result on whether the setup reaches the required endpoint without excessive removal, persistent scratches or an impractical cleanup burden. A wet shine can hide all three until the panel dries.
Cleanup and Wastewater Each Method Creates
Calling wet sanding cleaner confuses less airborne dust with less waste. The residue remains, and water can make containment and disposal more complicated.
The California Department of Toxic Substances Control sanding-waste guidance notes that fine sanding particles can be inhaled or carried home on clothing. It also states that dry sanding is preferred in auto-body work because wet sanding creates an additional contaminated-water waste stream, while recommending vacuum sanding to reduce airborne pollutants.
That preference isn't an endorsement of uncontrolled dry sanding. It's an argument for capturing dust without unnecessarily adding contaminated liquid.
Cleanup requirements by sanding method
| Cleanup task | Wet sanding | Dry sanding |
|---|---|---|
| Where slurry or dust goes | Drip pan or clarifier under the work | Vacuum with extraction at the tool |
| Liquid waste | Collected water that may need settling or treatment | None from the sanding itself |
| Drain rule | Keep out of gutters, storm drains and ordinary sinks | Keep residue out of drains |
| Settling or treatment | Per local rules, settling, evaporation or treatment | Not applicable |
| Solids disposal | Contained and disposed of under local rules | Dust bagged or filtered under local rules |
| Typical cleanup effort | Water handling, settling and drying | Vacuuming and wiping; no settling |
Collect first, determine disposal second
The City of Torrance best-management guidance supports minimizing water use, collecting residue and treating sanding wastewater as a waste stream. A spray bottle and catch pan can make more sense than repeatedly flooding a panel from a bucket.
Use a controlled disposal sequence:
- Contain the liquid. Place collection beneath the work before sanding starts.
- Identify the residue. Paint, metal and filler affect disposal requirements.
- Separate only where permitted. Settling, evaporation or treatment must follow local rules; clear-looking water isn't automatically drain-safe.
- Secure the solids. Keep collected residue contained and use the locally approved disposal route.
For occupied renovation work, CS1 Real Interiors' clean job site standards for homeowners offer useful context for setting expectations around containment and end-of-day housekeeping.
A method isn't cleaner if the worker controls airborne dust but sends the same contamination into a drain.
Treat cleanup as a performance criterion alongside removal speed and finish quality. The practical comparison is controlled low-water wet sanding against source-captured dry sanding, not wet sanding against a room full of uncontrolled dust.
Choose Your Sanding Method Before the First Pass
Make the decision before opening the abrasive pack. Name the required result, confirm the material and coating, then choose a setup that can contain the residue. If you can't explain where the dust or water will go, the job isn't ready.
Match the situation to the setup
- Bulk removal or filler shaping. Choose dry sanding with effective extraction when the immediate goal is removing material and establishing shape. Don't begin with fine wet sanding because the final surface will eventually need polishing.
- For refinement on a compatible cured coating, use a wet-rated abrasive on a sanding block. Let the coating instructions, remaining film thickness and defect severity determine the starting grade. A minor dust nib doesn't justify aggressively leveling the surrounding panel.
- Drywall or silica-containing materials. Select the dust-control method before the finish method. Wet sponging can suit drywall finishing, while mineral-containing surfaces require equipment and work practices appropriate to their hazards. Respiratory protection supplements those controls rather than replacing them.
- Where water supply or disposal is limited, compare a low-water spray setup with extracted dry sanding. A nearby sink isn't a disposal plan. If you can't collect and legally manage slurry, don't create it merely to avoid vacuuming.
- Mixed preparation and finishing. Use different methods for different stages where the material allows it. Complete the shape correction, inspect the surface, and only then move into refinement. Switching methods is useful when it changes the job you're doing, not merely the appearance while sanding.
Set a stop condition before starting
Decide what completion looks like for the current stage. For shaping, that means the intended contour without unresolved highs or lows. For refinement, it means an even scratch pattern suitable for the next operation.
Stop and reassess if the abrasive stops cutting, a coating edge becomes exposed, or an isolated scratch remains while the surrounding surface keeps thinning. More pressure isn't a reliable correction for any of those conditions.
Have the appropriate collection equipment ready, whether that's an extraction system or a spray bottle, catch pan and waste container. Keep clean inspection cloths separate from residue-covered cleanup cloths, and verify that every accessory exposed to water is rated for that use.
For a practical next step, buy a wet-and-dry-rated preparation assortment for the stages you need, adding finer finishing sheets where necessary. Test both approaches on scrap of the same coating before committing to the visible surface.
Choose by the work stage, confirm against the material, then approve the method only when you can manage its dust or water. That produces a more defensible decision than choosing wet or dry sanding by reputation.
EZARC Tools offers sanding and polishing accessories for surface preparation, including wet-and-dry hand-sanding options and accessories for paint and rust removal. Visit EZARC Tools to match an assortment to your preparation stages, then test the selected abrasive on a representative scrap before sanding the finished workpiece.