
 로그인


The most repeated advice about a rebar cutter drill bit is to buy the hardest, most expensive one on the shelf. That's the part of the decision I'd worry about last.
Two things decide whether a hole through reinforcement gets finished. The first is whether the tool is in the right mode at the instant the tip touches steel. The second is whether anyone established that this particular bar is safe to cut. Get either wrong and the best carbide in the catalogue saves neither the bit, nor the hole, nor the anchor schedule.
Table of Contents
- Why a Standard Bit Stalls on Rebar
- Which Bit Fits Each Job
- Matching Diameter, Shank and Drill Setup
- Cut, Stop or Relocate When Steel Appears
- How to Switch Modes When the Bit Hits Steel
- Heat, Jams and Dust Problems and Fixes
- Pre-Drill Checklist and Final Decision
Why a Standard Bit Stalls on Rebar
The hole is going fine. The masonry bit is eating through the slab with that steady grit-and-dust rhythm, dust is flowing, and then it stops dead. The drill chatters, the bit smokes, and the tip comes out rounded and blued. That stop is a steel bar, and no amount of extra pressure gets a standard bit through it.
A masonry bit is built to grind abrasive material away. Its edge scratches concrete, and concrete scratches back, wearing the edge down slowly and predictably. Steel asks for the opposite. It's tough, it doesn't abrade the edge, it work-hardens under load, and it polishes a concrete-cutting tip flat instead of refreshing it. Grinding through sand and grit with an abrasion-resistant edge is like dragging a file over a steel nail. The file loses, every time, and it loses faster the harder you push.
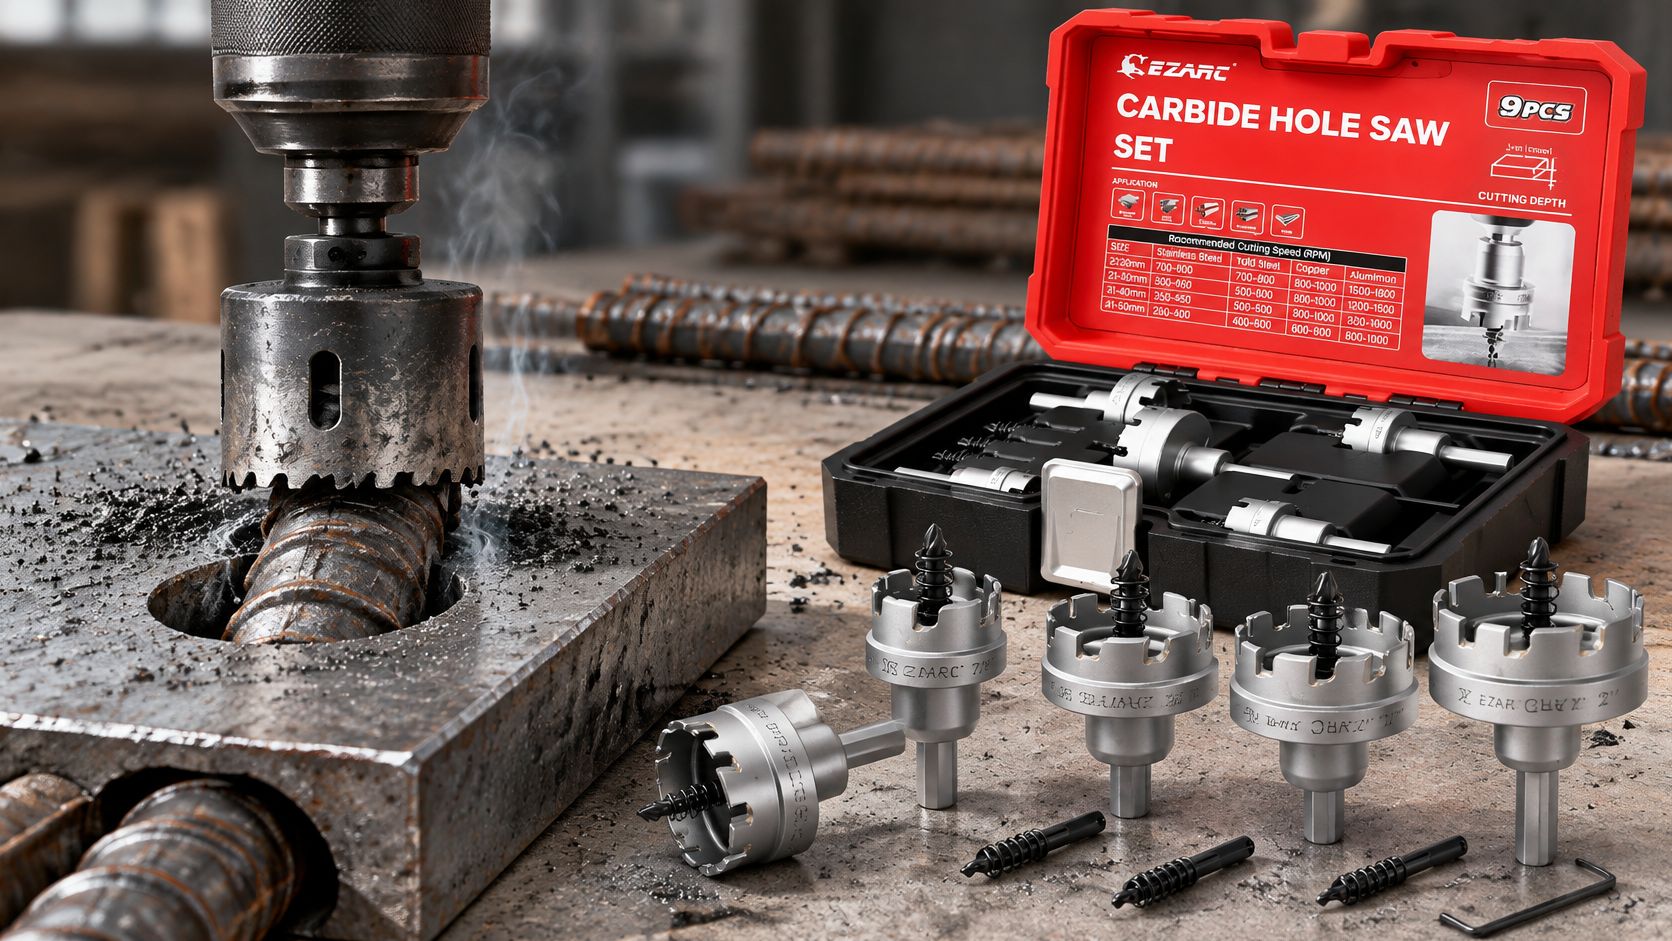
Rebar is ribbed steel set inside concrete to carry the tensile loads concrete can't take itself. Because reinforced concrete is the default structural system worldwide, meeting a bar mid-hole isn't bad luck, it's the ordinary condition of the work. Construction consumes approximately 50% of global steel production, including structural steel and reinforcing bar used in buildings, bridges and infrastructure, and independent market estimates put global rebar volume at roughly 144.75 million metric tons in 2025, with projections reaching 201.56 million metric tons by 2031, according to steel industry statistics published by Steelonthenet. Renovation, anchor installation, utility routing and structural modification all run into the same obstacle for the same reason.
The accessory has to do two jobs at once. It must resist abrasion from concrete, and it must survive interrupted cutting as the tip crosses concrete, then steel, then the ribs of the bar, again and again. Carbide is the material that makes both possible, which is why rebar-rated designs use carbide cutting elements rather than high-speed steel.
The takeaway isn't "buy carbide". It's that the bit has to match what's in front of the hole. The wrong bit either destroys itself on a bar or, worse, gets forced hard enough to damage the concrete and reinforcement around it.
Which Bit Fits Each Job
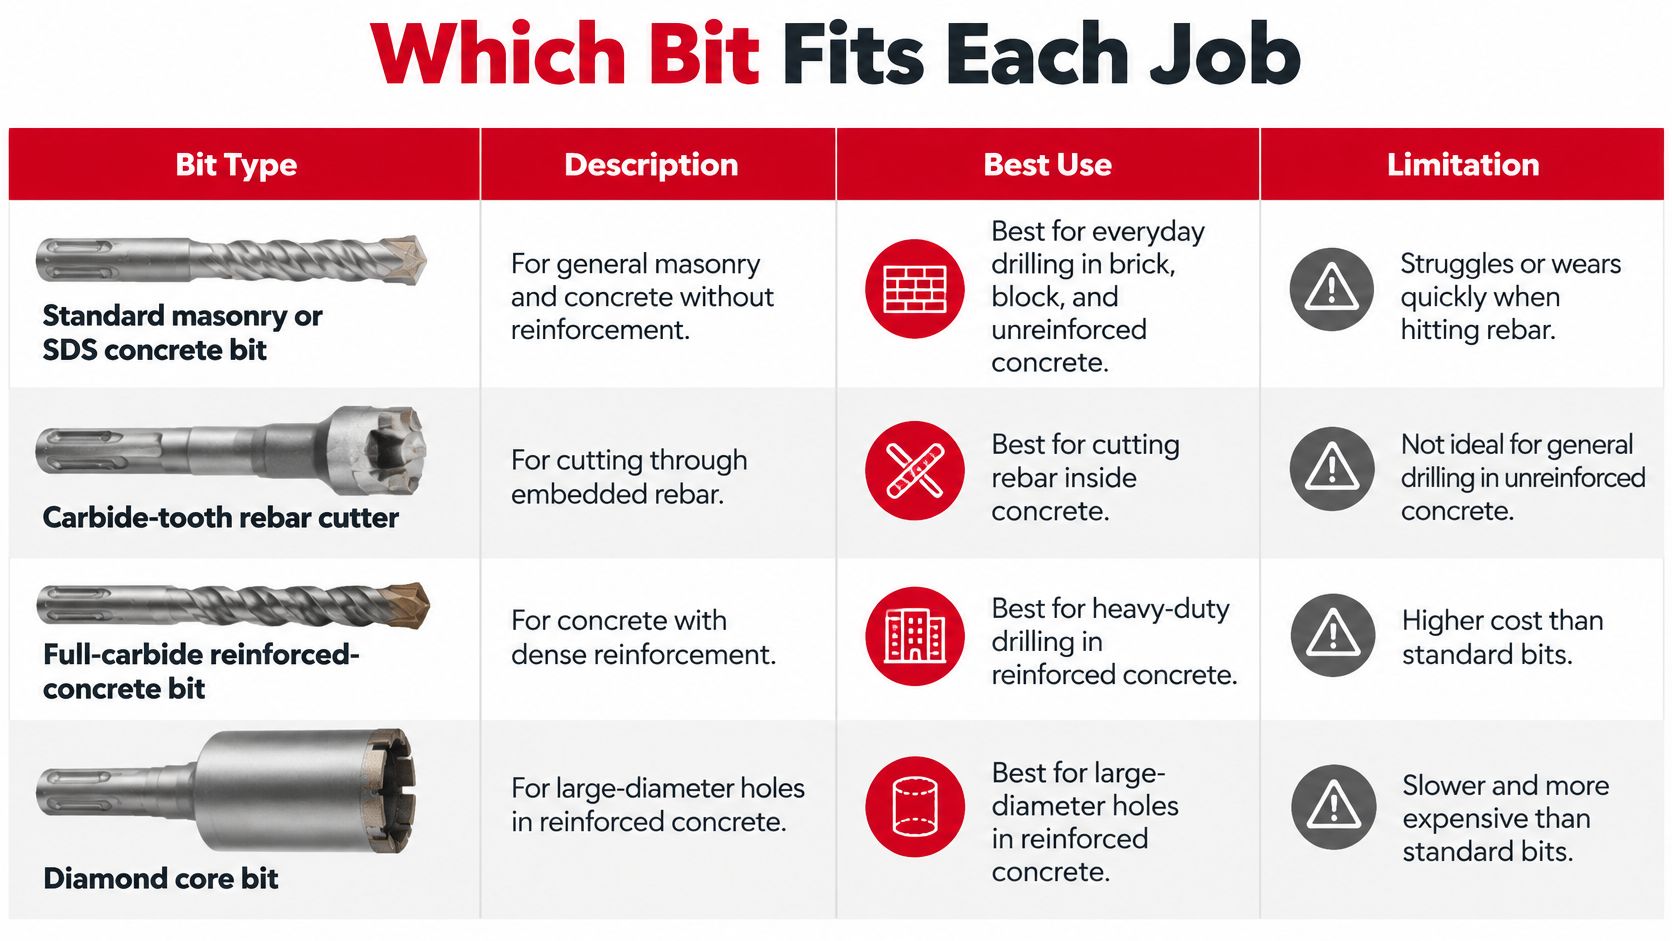
Four products cover almost every hole you'll drill into concrete, and they are not interchangeable. Read the mode column before you read the price.
| Bit type | Cutting mode | Suited to | Main limit |
|---|---|---|---|
| Standard masonry or SDS concrete bit | Hammer or rotary | Concrete and masonry only | Dulls or breaks on steel, so do not use it for rebar |
| Carbide-tooth rebar cutter | Rotation only, hammer off | Cutting one reinforcing bar, then returning to the concrete bit | Wears quickly if run in ordinary concrete |
| Full-carbide reinforced-concrete bit | Hammer drilling, one pass | Concrete and reinforcement in one hole | Confirm the rating says rebar or reinforced concrete |
| Diamond core bit | Rotary | Intensive work or bars about 16 mm and larger | Higher cost, and it needs a stable rig |
Why the modes don't swap
The carbide-tooth crown cutter exists to cut the bar and nothing else. You drill concrete with the ordinary bit, switch to the crown when you hit steel, then go back. The full-carbide reinforced-concrete head is a different animal: it drills concrete and reinforcement in a single pass and keeps hammer action running. Buying one and treating it like the other is how people wreck tools.
Where the job is intensive, or the bar is around 16 mm and larger, coring with a diamond bit beats any handheld percussion accessory. That's a rig-and-water decision, not a bit-on-the-shelf decision.
Why carbide, and why the binder matters
Modern rebar bits pair hard tungsten carbide grains with a tougher cobalt binder, the same cemented-carbide architecture that cutting tools have used for a century, as material histories of tungsten carbide describe. The reason is that wear resistance and toughness are separate properties. Tungsten carbide handles the abrasion from steel and concrete. The cobalt matrix absorbs the vibration and impact of interrupted cuts. Maximize hardness alone and you trade one for the other, which is why hardness numbers on a box tell you less than the grade and the braze quality behind them.
Check the label and the tip
Packaging is the cheapest test you can run in the aisle. The bit must state rebar or reinforced concrete, not merely "concrete" or "masonry", and the diameter, drilling mode and shank must match the tool in your hand. A 2023 study published in the National Library of Medicine reported that changing the drill-bit tip angle from 75° to 90° enabled cutting of reinforcing bars that had previously resisted cutting, which is a reminder that geometry does as much work as material (PMC study on drill-bit tip geometry). If a bar is fighting you, the tip profile is worth questioning.
For related background on how these edges are built, this explanation of what makes a carbide drill bit different covers grades and construction. Hole saws are a separate tool for a separate job, but they follow the same material logic: the Tungsten Carbide Hole Saw Kit, 7/8" to 2" Hole Saw Set with Pilot Drill Bits and Hex Key for Stainless Steel and Hard Meta uses industrial-grade tungsten carbide teeth with a cobalt HSS pilot drill for stainless steel, sheet metal, cast iron, mild steel and aluminium, and includes a safety stopper to limit over-drilling.
Matching Diameter, Shank and Drill Setup
Before the bit goes in the chuck, run two checks. The cutter must match the bore diameter you've already drilled, not a size you picked independently, because a rebar cutter follows the hole rather than making a new one. And the shank must fit the host tool: SDS Plus, SDS Max, hex or whatever your drill takes. Getting either wrong wastes a trip and, in the case of a mismatched shank, can damage the chuck.
Then deal with rigidity, because carbide is brittle. It holds an edge at temperatures that destroy high-speed steel, and it tolerates flex, side loading and runout badly. A hand-held drill with the bit hanging out of the chuck is the worst case.
- Shorten the overhang. Chuck the bit as deep as the flutes allow. Every extra centimetre of unsupported shank magnifies wobble at the tip.
- Hold the work. Block and clamp the workpiece, or brace against the structure so the drill can't walk when it breaks through.
- Use a guide where it matters. A drill stand, a guide rail or a rigid spindle keeps the bit concentric with the hole. Freehand drilling on a ladder is where teeth chip.
- Trust the speed and feed data. Don't compensate for a dulling cutter with more push.
Those two failure directions are worth knowing by feel. Excessive speed accelerates wear and heat. Insufficient feed is sneakier: the edge rubs instead of cutting, so you get heat and noise without penetration, and the tip polishes itself flat.
The clearest demonstration is a bit that cuts beautifully in a rigid rotary stand on a piece of bar, then chips or seizes on the same bar held freehand. Nothing about the bit changed. The setup did. If you're still working out which accessory belongs in which tool, this breakdown of the differences between drill bit types is worth ten minutes before the next purchase.
The bit gets blamed for a failure that started at the chuck, the guide and the feed rate.
The full pre-drill sequence is at the end of this article, so you can run it once rather than twice.
Cut, Stop or Relocate When Steel Appears
Here's the assumption worth challenging: that finding rebar means cutting rebar. It doesn't. Reinforcement carries tensile load, and the decision to sever it belongs to whoever is responsible for that structure, not to whoever is holding the drill. Public construction guidance is blunt about the sequence: dowel holes must be located according to project plans, drilled into sound concrete and kept to the specified depth, because over-drilling can create a through-hole and let bonding material drain away, as the Caltrans structure construction guidance sets out.
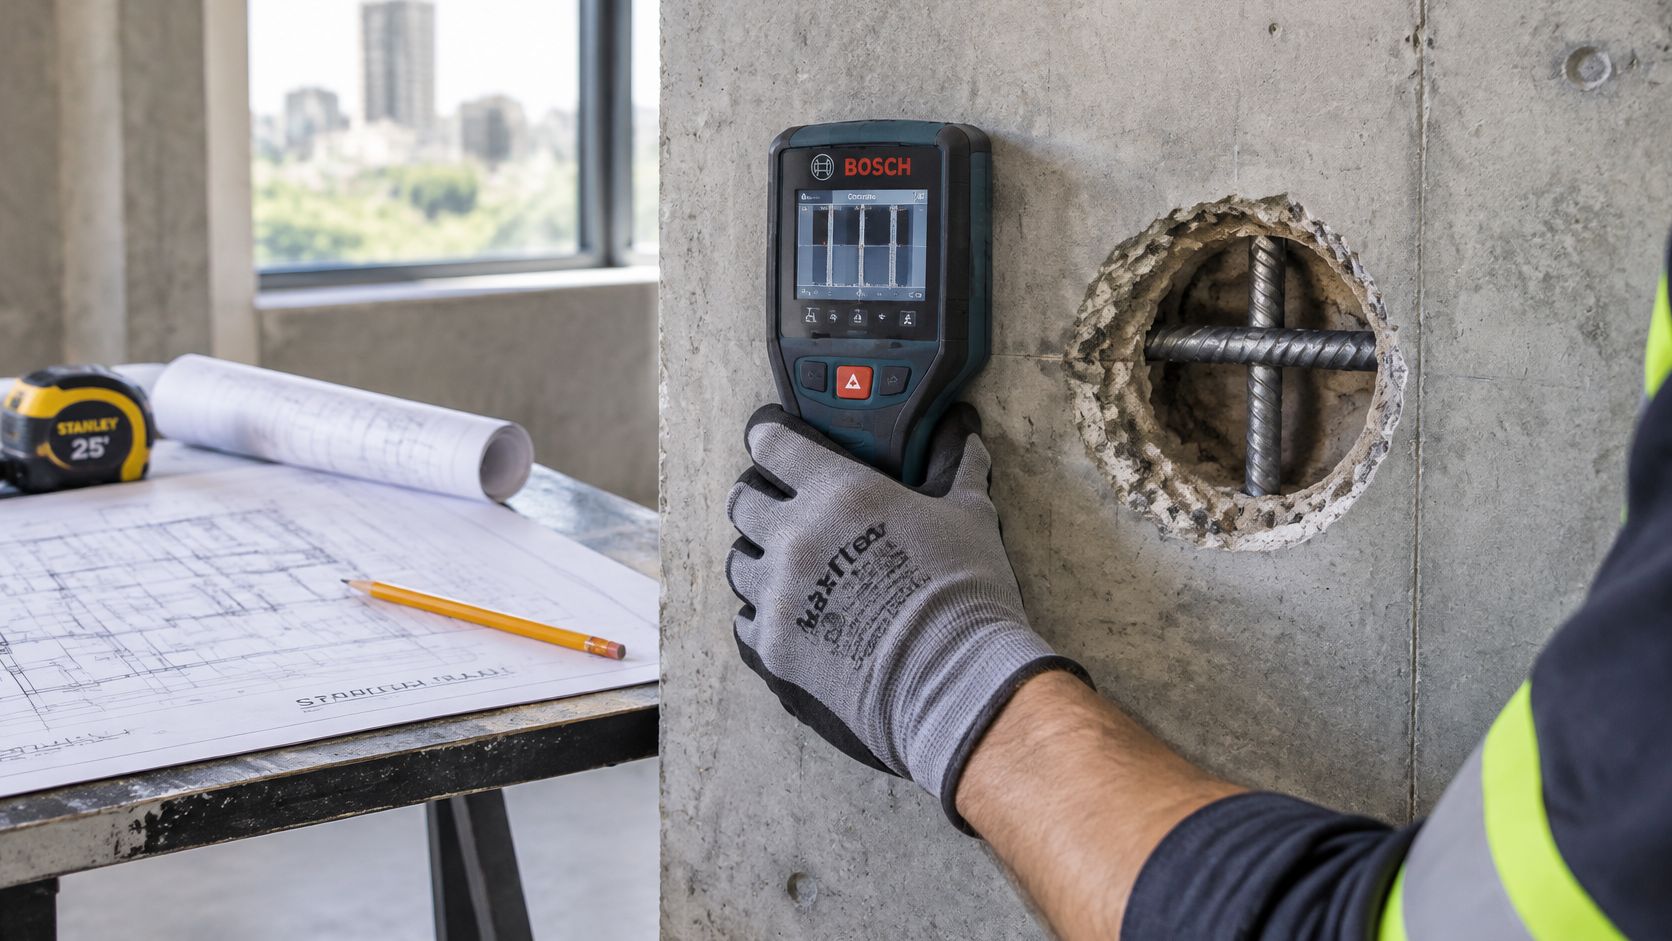
So the first action after a scan shows steel isn't a mode switch. It's a check. Read the drawings, compare the scanned location with the plan, and where the element is structural or sits in an anchorage zone, get the engineer or responsible person to approve a cut or a relocation. Only then does tool technique enter the conversation.
The situations and the answers
| Situation | Action | Why |
|---|---|---|
| Rebar in a structural element or anchorage zone | Stop and get engineer or responsible-person approval before cutting | Reinforcement carries tensile loads |
| Bar sits where the plan says the hole should go | Do not cut just to keep the position, relocate as approved | Keeps the anchor and bond placement the design expects |
| Non-structural slab with a bar in the way | Locate, then cut with a rotation-only rebar cutter | Low structural risk if the cut is approved and controlled |
| Hole is near the specified depth limit | Control depth and stop before a through-hole forms | Over-drilling lets bonding material drain away |
| Dust is building up while drilling | Use a drilling jig and vacuum before continuing | Uncontrolled lateral drilling reached 14 times the NIOSH limit in one study |
Relocating a hole by 40 mm costs a conversation and a re-scan. Cutting a loaded bar in an anchorage zone costs something you can't inspect afterwards. That's the whole argument for putting approval ahead of technique. If the approved answer is a new opening rather than a hole, the structural work itself needs the same discipline, and a specialist in removing an internal load-bearing wall will confirm what has to be carried before anything is cut.
Dust belongs in the same decision
The second neglected risk isn't structural. Drilling concrete releases respirable crystalline silica, and one field study found uncontrolled lateral drilling produced mean exposure 14 times the NIOSH recommended exposure limit, while combining a drilling jig with a vacuum cut exposure by 94%, to about 80% of that limit, as reported in the same Caltrans guidance on drilling and anchoring. A jig and a vacuum aren't accessories for the fussy. They're the difference between a compliant hole and a exposure event.
Respiratory protection, eye protection and hearing protection belong on before the drill starts, not after the dust settles on the van.
The rule that overrides the rest: the cut, stop or relocate decision belongs to the person responsible for the structure. Everything in the next section assumes that decision has already been made and approved.
How to Switch Modes When the Bit Hits Steel
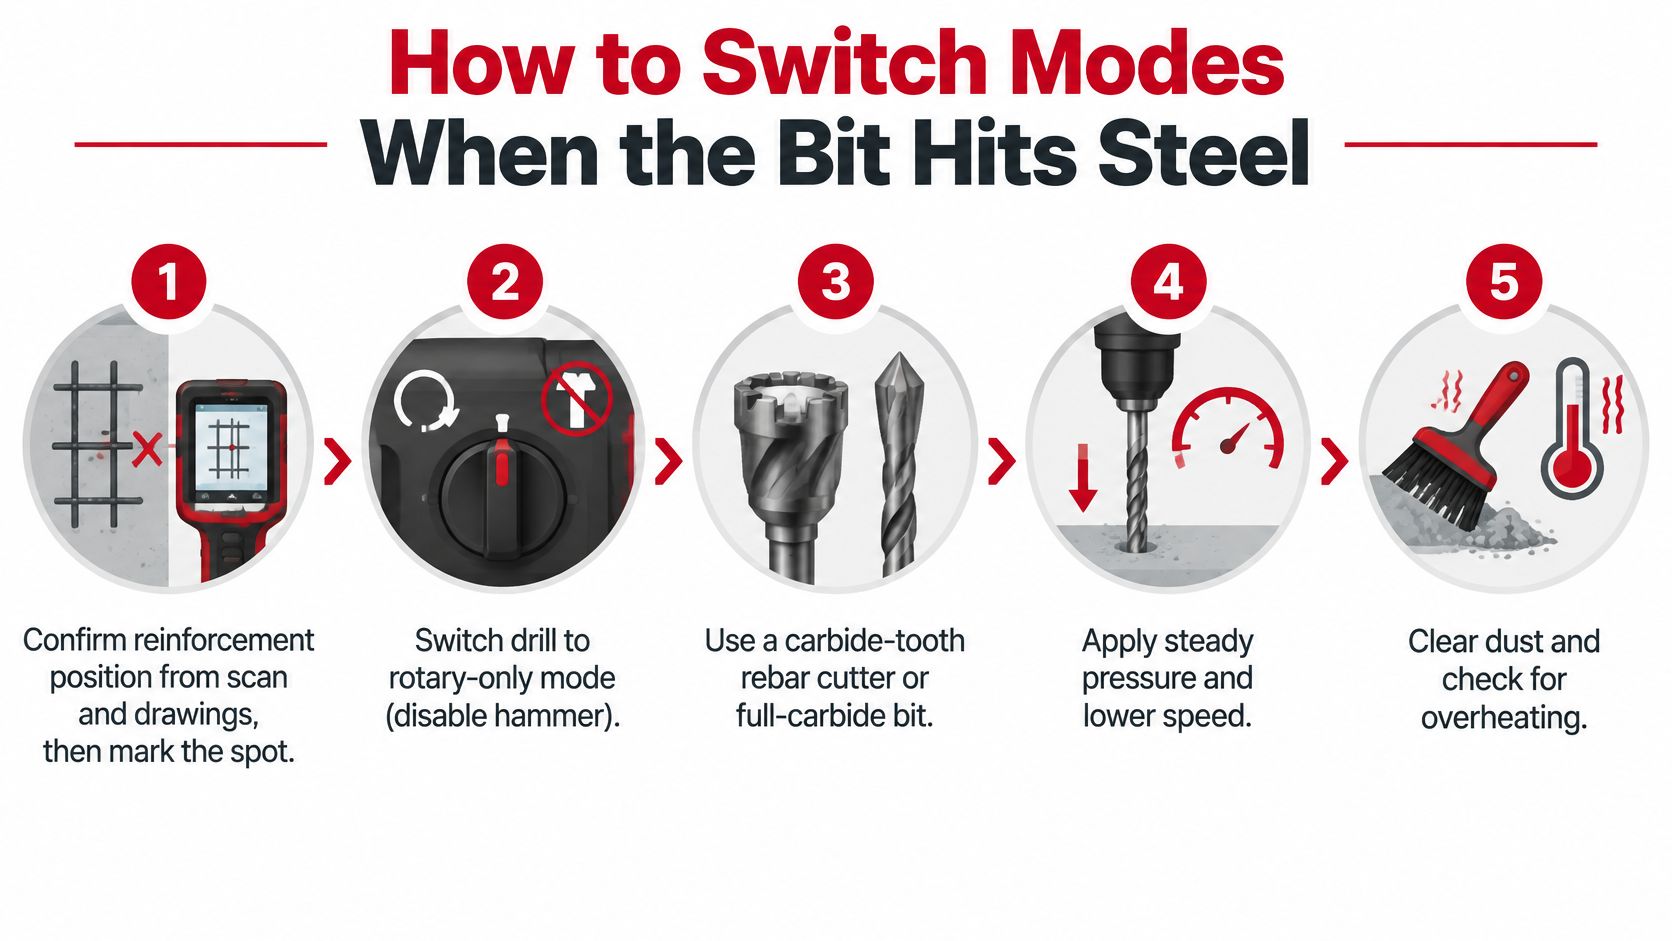
The bar is approved to cut, the hole location is marked and the reinforcement position is confirmed. From here it's a sequence, and the sequence is the technique.
- Mark the hole from the scan and the drawings. The mark should sit where the design wants it, not where the bar happens to be. Confirm the position before the bit touches concrete.
- Drill the concrete with the ordinary masonry or hammer bit. This is the bit that removes abrasive material efficiently. Running a rebar cutter through plain concrete wears the crown for no benefit.
- Stop the moment you reach steel and switch hammer action off. A carbide-tooth crown rebar cutter is intended to cut the bar in rotation-only mode. Hammering a brazed carbide edge against steel can damage the carbide or shear the braze, which is where the Hilti guidance on concrete and masonry drill bits draws the line between cutter types.
- Fit the rebar cutter and cut with steady, moderate feed. Rotation only, no percussion, no leaning on the drill. The cutter must match the bore you already have, so it follows the hole rather than opening a new line.
- Release pressure periodically and watch for heat. Excessive dwell on the bar builds heat and shortens the cutter's life. If the crown starts to blue, stop. Discoloration is the signal, and the fault table in the next section covers what to do about it.
- Once the bar is cut, withdraw, clear the debris and go back to the concrete bit. The concrete bit finishes the hole. Putting the cutter back into abrasive concrete just grinds the life out of it.
The logic in one line: concrete with the conventional bit, steel only when steel appears, then concrete again. That three-stage approach beats any single bit used for the whole hole, and it's the reason a modest cutter outlasts an expensive one that's asked to do everything.
Before you start, make sure the drill itself is behaving, because a clutch that slips or a chuck that runs out will undo good technique. This guide to using a hammer drill properly covers the settings.
You know the cut is done when the bit advances freely again and the cutter comes out without heat marks. If it comes out blue, you cut the bar but shortened the tool.
Heat, Jams and Dust Problems and Fixes
The most common fault has a colour. The cutter turns blue, which means heat has built up from dwelling in one spot or leaning on the drill. The fix is a stop, a release of pressure, a few minutes of cooling, then a restart with steady moderate feed in rotation only. Keep going and you'll spend the price of a new cutter to save thirty seconds.
| Symptom | Likely cause | Fix |
|---|---|---|
| Cutter turns blue | Overheating from dwell or too much pressure | Stop, release pressure, let it cool, then resume with steady moderate feed |
| Teeth chip or break | Side load, flex, or hammer mode left on while cutting steel | Shorten overhang, add a rigid guide, switch hammer action off |
| Bit jams in the bar | Chip packing or forced feed | Release trigger, reverse gently, withdraw, clear debris, inspect the cutter |
| Edge rubs and smokes without cutting | Feed too light for the bit | Increase steady feed within the manufacturer's data |
| Progress slows in a deep hole | Chip packing | Withdraw every 10 to 15 seconds or use dust extraction |
A jam is where impatience does the most damage. Don't force it. Release the trigger, reverse gently while the bit is still rotating, withdraw it, clear the debris and inspect the cutter before you go again. Forcing a seized bit snaps teeth or, worse, spins the whole drill against your wrist.
Deep holes need their own rhythm. Carbide drilling guidance from McMaster-Carr recommends withdrawing the tool roughly every 10 to 15 seconds or using dust extraction, and notes that coolant-through delivery becomes worthwhile at depths of around three to five times the tool diameter. Those clearances and intervals exist because packed chips stop the edge cutting and start it rubbing.
Slow is normal, stalling is not
New operators kill cutters by assuming a slow cut is a failing cut. It often isn't. A 2024 study published by the Society of Mechanical Engineers and Robotics reported that an 11 mm diameter D10-class reinforcing bar could be pierced in 730 to 1,020 seconds using a 2.24 kW rock drill and rake-angle bits (study on rebar piercing with rock drills). That's twelve to seventeen minutes for one bar. Steady progress on a sound cutter is doing its job. Only stalling, smoke or heat marks call for intervention.
Dust control does two jobs at once here. It keeps chips out of the kerf so the cutter isn't regrinding debris, and it keeps silica out of your lungs. If you're setting up extraction for the first time, this guidance on silica dust exposure prevention covers the controls that reduce exposure rather than just moving the dust around.
Most faults on that table cost you a few minutes. Chipped teeth and a blued crown cost you a bit.
Pre-Drill Checklist and Final Decision
Before the next hole, run this list once and in order. It takes less time than the first stalled attempt.
- Bit rated for the material. The packaging says rebar or reinforced concrete, not just masonry.
- Diameter and shank matched. The cutter matches the existing bore, and the shank fits the drill.
- Reinforcement located. Drawing review plus a scanner or cover meter, before the bit touches the surface.
- Approval in hand. Engineer or responsible person signed off on cutting or relocating anything structural.
- Mode set for steel. Rotation only, hammer action off, the moment the cutter goes in.
- Depth controlled. A stop, a tape mark or a count on the drill so you don't punch through the specified depth.
- Extraction and PPE ready. Vacuum or jig in place, respiratory, eye and hearing protection on.
- Stop signals understood. Blued teeth, a bit that won't advance, or a hole approaching the specified depth means stop, not push.
Two of those items are planning and two are technique, and the planning ones come first. That isn't bureaucracy. A drawing set that flags a beam where you planned to drill saves the whole exercise, and knowing how to read one is a skill in its own right, which is why guidance on catching conflicts in drawing sets pays for itself before anyone lifts a drill.
Here's the single decision to make before every hole through reinforced concrete. Is this a drilling problem, meaning a rebar-rated bit in the right mode will finish it? Or is it a structural question that needs approval before a bit is chosen at all? Answer that, and the equipment choice becomes easy.
For the cutting side of the same problem, our diamond metal cutting wheels are built for rebar, steel, iron and inox, starting at $14.95, which gives you a second route when a bar has to come out rather than be drilled past.
If you're kitting out for reinforced concrete work, EZARC Tools covers the accessories this article keeps asking for, from carbide construction to cutting and grinding. Our diamond metal cutting wheels are made for rebar, steel, iron and inox, starting at $14.95, so the bar you're allowed to cut has a clean way out. Browse the range at EZARC Tools before the next hole gets drilled.