
 Einloggen


Three-quarters of the way through a rip in a sheet of 3/4 inch plywood, the saw slows, the offcut closes on the back of the blade, and the whole sheet lifts a few millimetres off the sawhorses. That stall is a common cause of ruined boards and injuries.
It rarely comes from the pencil line. It comes from the blade in the arbor and the way the board is supported. Cutting wood comes down to how the blade meets the stock, and setup decides that before the trigger is pulled. The same wrong setting fails differently on a rip than on a crosscut, and the dust the cut throws tells you which mistake you made.
The tool's ancestry explains the bias. The circular saw grew out of late-eighteenth-century sawmill machinery built to rip logs into lumber, and a documented English patent granted to Samuel Miller in 1777 described a mill using saws "which are a circular figure," as the documented history of the circular saw's invention records. Ripping is what the geometry was built for. Sheet goods, trim and clean crosscuts are later adaptations, and each one punishes a mismatch in its own way.
Table of Contents
- Choosing the Blade by Cut Type
- Setting Up and Test-Cutting Before the First Cut
- How to Make a Controlled Rip or Crosscut
- Fixing Burn Marks, Tear-Out and Wandering Cuts
- Kickback and Other Dangers to Plan For
- Dust Control and Silica Exposure
Choosing the Blade by Cut Type
A blade that rips cleanly through framing lumber will chip veneered plywood, and a blade that leaves a glassy crosscut will smoke its way through a long rip. Match the tooth pattern to the cut, not to whatever happens to be on the arbor.
| Cut type | Tooth count | Tooth style | What it gives you |
|---|---|---|---|
| Rip cuts along the grain in solid lumber | 18 to 24 teeth | Flat-top or ATB | Fast cuts, rougher edge |
| General crosscuts in hardwood and softwood | About 40 teeth | Alternate top bevel | Balanced speed and clean edge |
| Plywood, MDF, OSB and laminate | 60 teeth or more | Fine ATB | Less chipping on face veneer |
| Fine trim, moldings and cabinetry | 60 to 80 teeth | Fine ATB | Smooth edges at slower feed |
| Nail-embedded or reclaimed wood | No fixed count | Check for metal first | Remove nails where possible |
Tooth count is a chip-clearing decision as much as a finish decision. A 24 tooth blade has deep gullets that swallow material quickly, which is why it rips fast and leaves a rougher edge. A 60 tooth blade cuts smoothly but clears chips slowly, so forcing it through resinous pine heats the plate, loads the motor and leaves burn marks. The same blade fails differently by cut type: a fine blade that dogs down on a long rip can still crosscut acceptably, because the cut is short and the gullets have room to clear between strokes. An overly coarse blade on veneered plywood tears the face on the exit side, where the teeth lift fibers the next cut would have supported.
Get the diameter and arbor right first. 7-1/4 inch blades on a 5/8 inch arbor are the common handheld pairing, and a blade that doesn't match either dimension won't seat or won't clear the guard.
Blade choice also changes what you breathe. In a NIOSH laboratory comparison of 22 circular-saw blades, respirable dust release generally increased as tooth count and kerf width increased, with uncontrolled release between 0.25 and 0.50 g/m, while a passive collector connected to the saw's dust box pulled that down to 0.12 to 0.29 g/m and captured up to 66 percent, depending on blade design (NIOSH circular saw blade dust comparison). The finer tooth pattern that gives the cleaner edge also puts more fine dust into the air, so picking a blade is partly a dust decision, and extraction matters more as the teeth get finer.
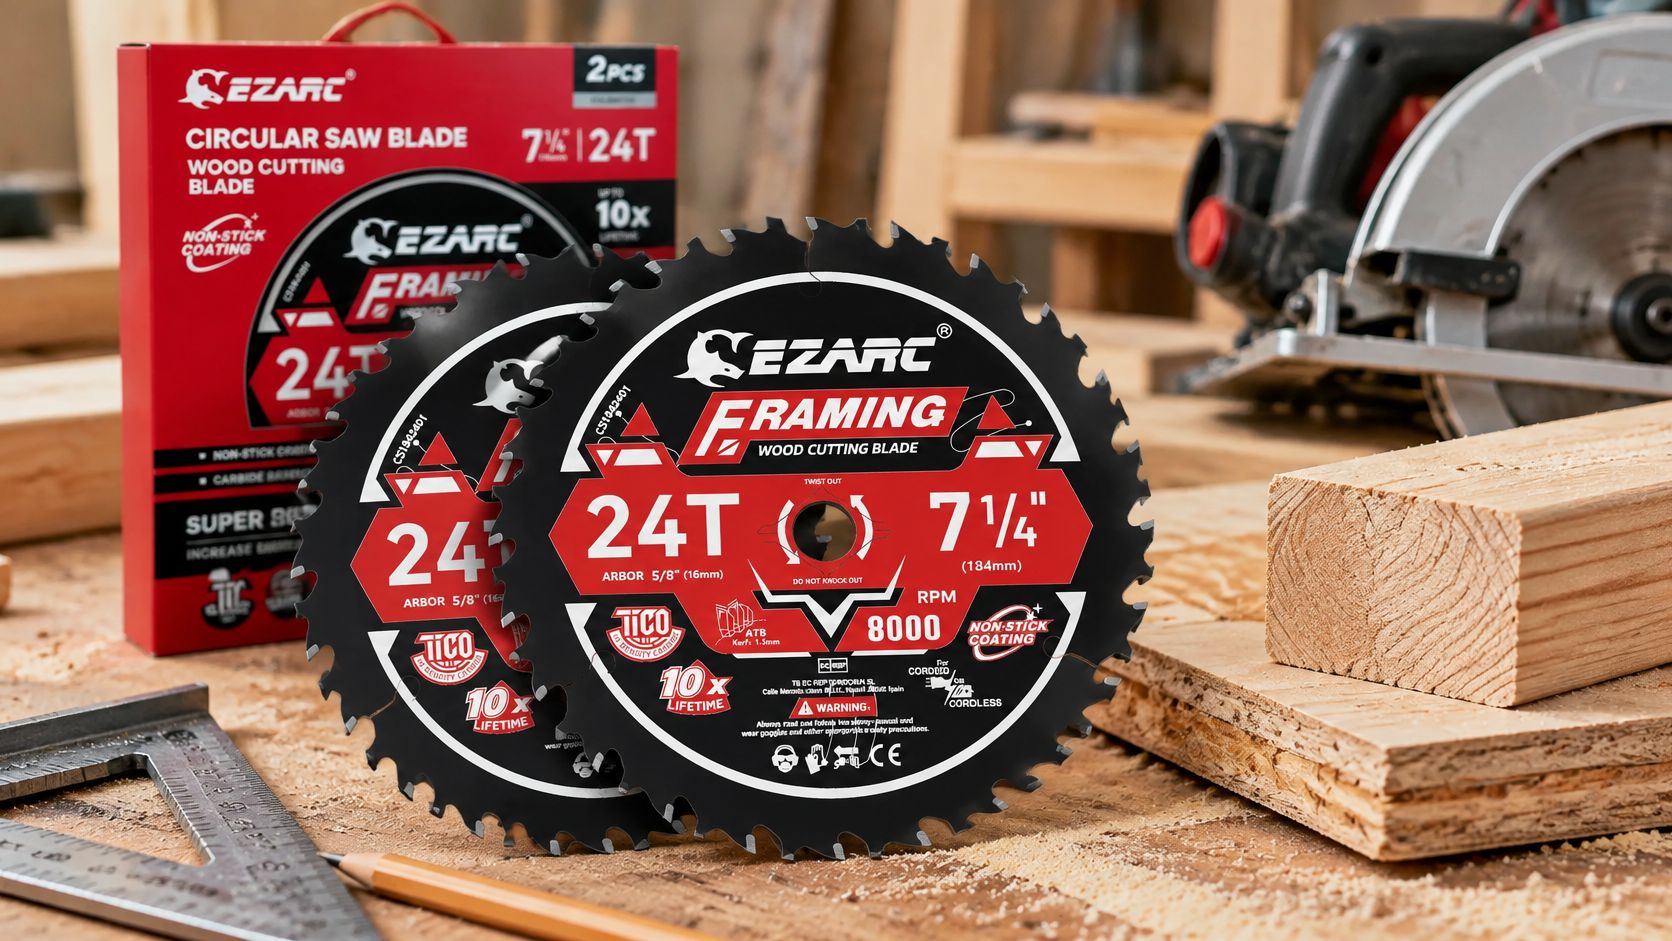
A thin kerf changes the feel of the saw. A blade with a 1.5 mm kerf removes less material and eases the motor, which matters on a cordless saw running a long rip, but the thinner plate flexes more, so keep the shoe flat on the board and let the blade follow the line instead of steering it. The EZARC 7-1/4 inch circular saw blades for wood cutting pair that ultra-thin kerf with a non-stick coating that resists pitch buildup, sold as a 2-pack starting at $24.97, so a fresh blade is already on hand when the first one loads up mid-job.
Setting Up and Test-Cutting Before the First Cut
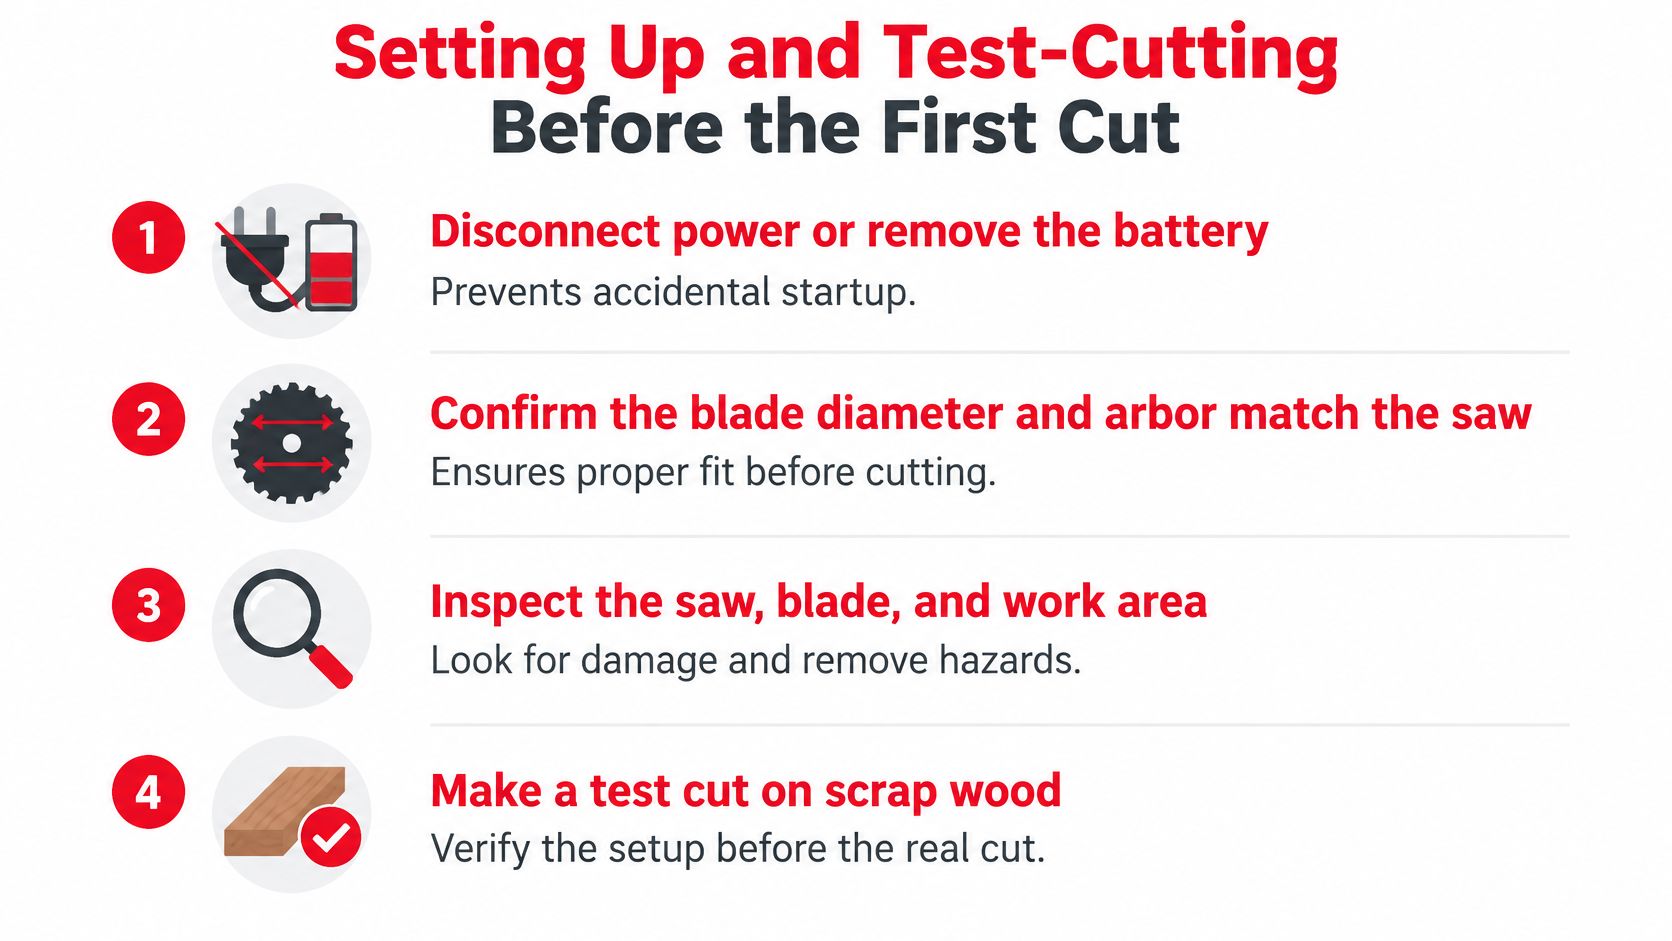
Most bad cuts are decided before the blade ever spins. A creeping bevel, a pitch-loaded plate or a board propped so it closes on the kerf will spoil the cut no matter how steady your hands are. Run this list in order every time the blade or the material changes.
- Kill the power. Pull the plug or the battery. Guard checks and blade changes are only safe on a saw that can't start.
- Match blade to saw. Diameter and arbor, confirmed against the manual. The wrong combination either won't seat or won't track straight.
- Inspect the teeth and the plate. Missing carbide, a bent plate or a heavy coat of pitch all show up in the finish. Pitch makes the blade run hot and rough; a resin remover and a brass brush fix it.
- Set depth about 6 mm (1/4 inch) below the board. Deeper exposes blade you don't need and adds drag. Shallower starves the gullets of chip clearance, and the blade dogs down.
- Swing the lower guard by hand. It should snap back over the teeth on its own. A guard that drags is hiding a pinch you'll meet mid-cut.
- Lock the bevel at zero for square cuts. A bevel that creeps two degrees shows up as a gap you'll chase with filler.
- Hook up extraction now. A vacuum on the dust port keeps the pencil line visible through the whole cut, and the hose routes far more easily before the board is clamped down.
- Stage the support. Set the board so the waste side can drop free, and clamp a stop block if you're cutting repeat lengths.
The test cut earns its minute
Never break down the good sheet first. Take a scrap of the same thickness, set it on the same support, and make a short cut. Three things you're checking: that the blade clears by the depth you set, that the shoe tracks the line without sideways pressure, and that the saw sounds like it's cutting rather than labouring.
Read the scrap the way you'd read a finished edge. Burn marks point back to a dull or pitch-loaded blade, or depth set too deep for the feed. Tear-out at the exit usually means the waste side dropped with nothing under it. A cut that drifts off the line means the shoe was never flat, or the plate is bent. If the scrap burns, tears out or drifts, the fix is upstream in this checklist: depth, blade or support.
On a rip, give the saw a few extra seconds of listening. A setup that survives a short crosscut can still bind halfway down a board, because a long rip gives the stock time to close on the plate. If the saw feels like it's working harder than you are, stop and re-check the setup. Pushing through it just turns a bad setup into a burned edge.
How to Make a Controlled Rip or Crosscut
A straight cut is a repeatable sequence, and the hands only prevent sideways pressure. Everything else is decided before the blade spins.
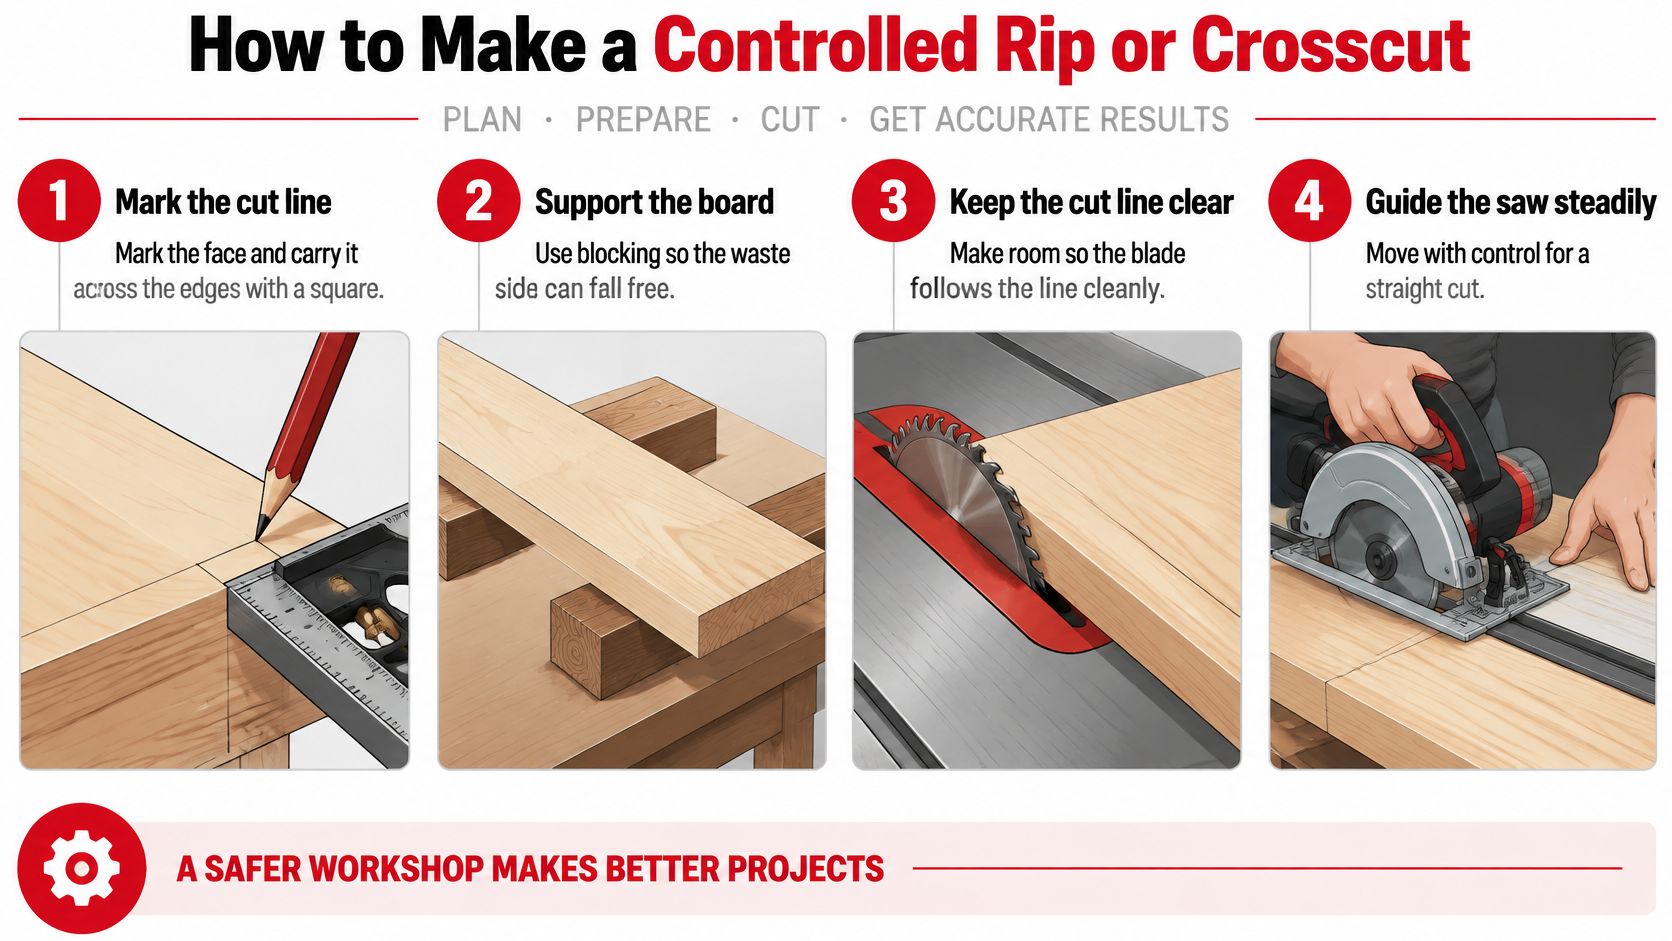
- Mark the face and wrap the line. Pencil on the face, then carry the line down both edges with a square so you can see it on the exit side.
- Set the support the way the setup checklist lays out, then name the waste side before you start. On a rip the offcut tracks away from the fence; on a crosscut it drops the instant the kerf opens. A board that closes on the blade at the end of the cut is a support problem.
- Set the shoe flat before the blade touches wood. Base fully on the stock, blade clear, cord trailing behind you where it can't catch the shoe.
- Both hands on the saw. Rear handle and front knob, both well outside the blade path.
- Full speed before contact. Let the motor reach its note, then bring the blade to the line.
- Feed steadily. The motor should hold pitch through the whole cut. If it drops, you're pushing. If dust builds on the line fast enough to hide it, the extraction isn't keeping up, and your next steering correction will be a sideways one.
- Guide the tool, not the blade. For a rip, run the shoe against a clamped straightedge or fence. For a crosscut, clamp a speed square or use a guide rail.
- Trigger off before you lift. Wait for the blade to stop completely; the lower guard closes properly only on a stopped blade.
Why the guide matters more on a rip
On a rip you're cutting along the grain and the kerf stays open, so the risk is drifting away from the fence and binding the blade in a curve. On a crosscut you're severing fibres, and the offcut can close behind the blade as the cut finishes. Same saw, same depth setting, opposite failure mode.
Kickback is the consequence when either goes wrong mid-cut. OSHA's handheld circular saw guidance treats it as a major hazard, and the U.S. injury figures behind it put kickbacks and guard malfunctions each at slightly more than 20 percent of reported portable saw injuries, with ripping at 24.1 percent of specified operations.
The sequence pays off most in cabinet work, where square parts make a square carcass and nothing else does. Jennifer Gilmer cabinet building advice makes the same point about accurate panel cuts before assembly, and it's worth reading with a straightedge in hand.
Curves and cutouts are a different tool and a different technique. If a 7-1/4 inch blade can't follow the shape, the guide on jigsaw blades, tips and tools covers the saw that can.
Most slips come from three habits: supporting the board so the kerf pinches shut, starting the cut with the blade already touching the stock, and letting the cord or an offcut catch the shoe halfway down the line. Each one is preventable in setup. A good cut finishes square against a try square, with no burn on the edge and a kerf that's clean on both faces. A ragged far end means the blade exited into unsupported material.
Fixing Burn Marks, Tear-Out and Wandering Cuts
| Symptom | Likely cause | Fix |
|---|---|---|
| Burn marks on the cut edge | Dull blade or feed too slow | Sharpen or replace the blade and feed steadily |
| Tear-out on the top face | Too few teeth or wrong face down | Score the line or use a finer blade with the good face down |
| Cut drifts off the line | Sideways pressure or bent blade | Check blade flatness, slow the feed, follow a guide |
| Motor bogs or stalls | Forced feed or pinched kerf | Release trigger, reset support, let blade stop first |
| Dust escapes around the guard | Dust port not connected | Reseat the port and check the connection before cutting |
Burn marks are the most common complaint and the easiest to misdiagnose. Two things cause them, and they feel identical. A dull carbide edge rubs instead of slicing, so friction heat glazes the wood. Hesitating through the same cut does exactly the same thing with a sharp blade, because the teeth sit in the kerf and polish it.
Tear-out on the top face is where a circular saw shows its limits. The teeth exit upward through the work, so the top veneer takes the last bite with nothing behind it. Score the line with a marking knife, flip the good face down, or drop to a finer ATB blade. On laminate and melamine, do two of the three.
A wandering cut is usually a technique problem before a hardware one. Sideways pressure on the handle bends the blade in the kerf and the cut follows the bend. Check the plate for flatness on a known flat surface first, then slow the feed and let a clamped guide do the work.
A kerf tells you what happened: brown edges mean heat, fuzzy edges mean the teeth were too coarse or too dull, and a kerf that widens at one end means the blade was steered.
Sort the fixes by cost. Reseating a dust port, easing the feed rate and re-checking depth take seconds. Tear-out and drift usually need a blade change or a new support setup, and no amount of technique rescues the wrong tooth count. Outdoor and treated stock adds its own variables, and FenceScape's guide to building a wood fence is a useful reminder of how wet, treated and end-grain timber behave differently at the blade.
Carbide teeth can be sharpened a limited number of times before the geometry goes. Once a blade shows missing or chipped teeth, retire it. A replacement is cheaper than the board it will ruin.
Kickback and Other Dangers to Plan For
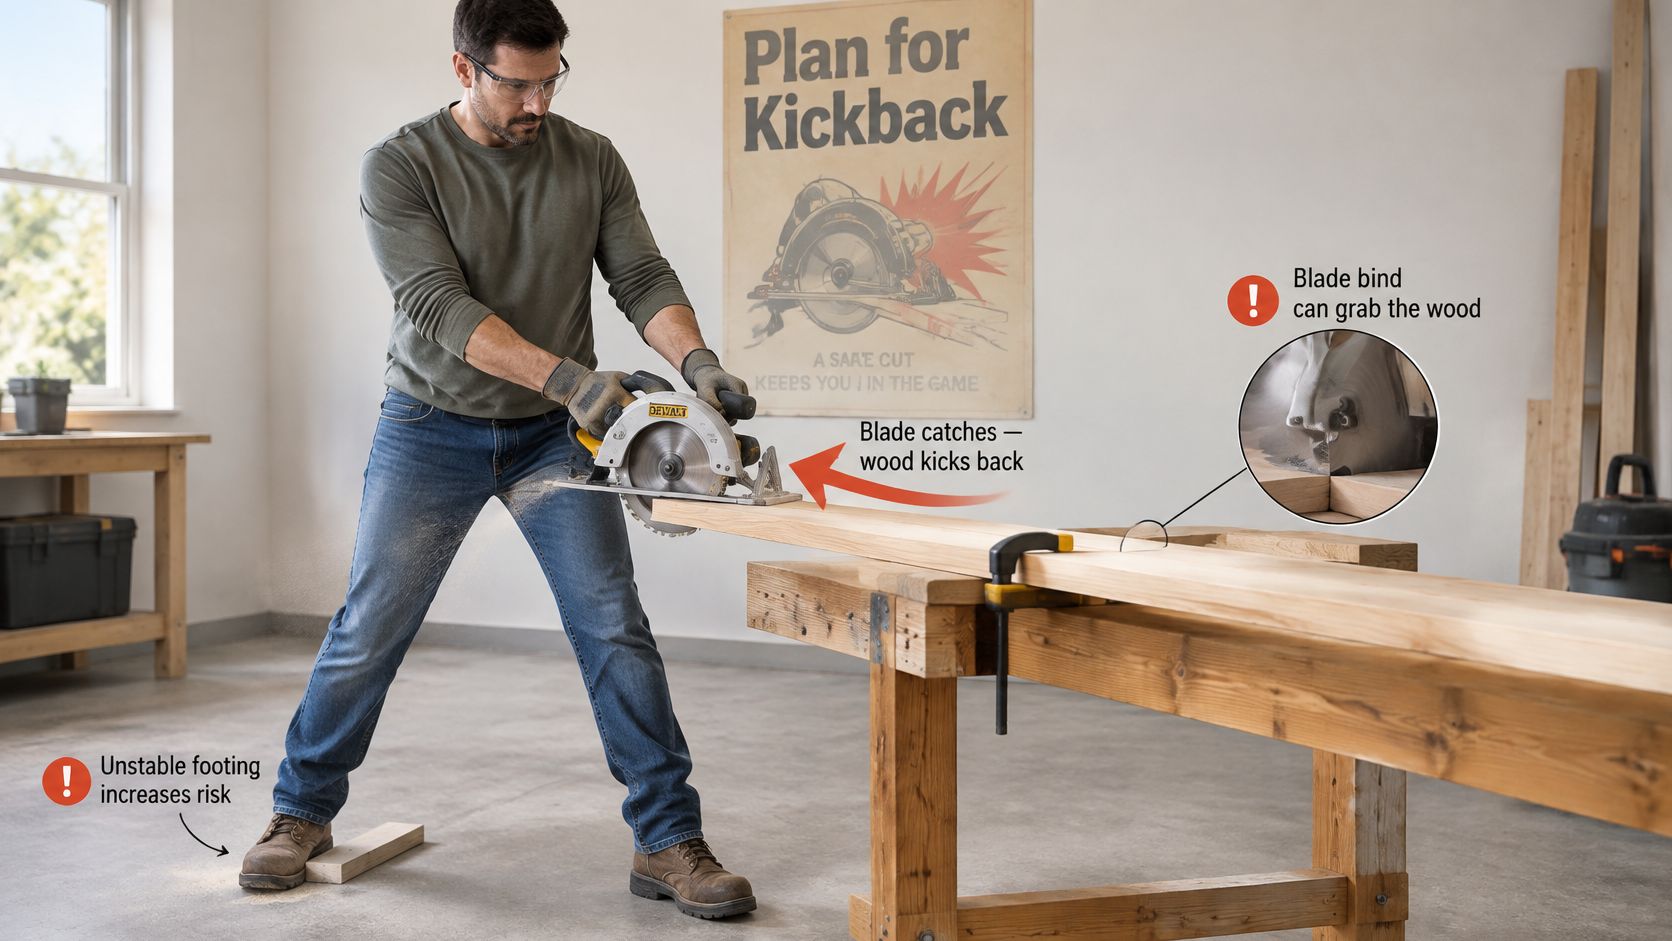
Kickback is the blade handing the board back to you. The rear teeth catch, the saw stops travelling, and the energy goes into the stock instead: an offcut can leave your hands faster than you can release the trigger. It is the reason support and stance matter more than feed speed.
The stakes are not hypothetical. A U.S. analysis published in January 1956 examined 1,021 injuries involving woodworking circular saws during 1951 and 1952 and found that direct contact with the blade caused 80 percent of them, with nearly 48 percent of disabling injuries producing some degree of permanent disability against less than 6 percent for disabling injuries across manufacturing generally (the 1956 woodworking circular saw accident analysis). Later Consumer Product Safety Commission estimates cover stationary saws rather than handheld models, but the pattern still points at the same failure: blade contact and workpiece control cause the damage.
Where a kickback starts
- A pinch at the rear of the blade. The kerf closes behind the teeth and the saw lifts instead of cutting.
- A loaded blade. Dull teeth, pitch buildup or the wrong tooth count for the material make the edge climb rather than shear.
- A guard that does not swing back. A sticking lower guard leaves blade exposed as the saw rises out of the cut.
The same depth setting fails differently on rips and crosscuts. On a rip, trouble usually comes from the kerf closing on the body of the blade, so keep the waste side free and stand slightly to the left of the line, out of the board's path. On a crosscut, the short offcut is the hazard; if it is trapped or rolls into the blade, it can be thrown back at your hands. Both hands stay on the saw, the shoe stays flat, and the blade reaches full speed before it touches wood.
When a cut stalls or the saw starts to climb, release the trigger, wait for the blade to stop completely, find the pinch point, and re-support the material. Never pull a spinning saw backward out of a binding kerf.
The habit that prevents most of this is dull and takes ten seconds: look at the support, look at the blade, look at the guard, before every cut. Guard design varies by model, so read the EZARC general instructions and safety warnings against your own saw's manual once. The video below shows a kickback and the stance that avoids it.
Dust Control and Silica Exposure
Dust is the part of the cut you can't see while you're watching the line, and it's where blade choice, feed rate and material all show up in the air you're breathing. Treat it as part of the cutting system, and pair each blade with a matching extraction setup.
- Identify the substrate first. Solid lumber, MDF, plywood and fibre-cement release very different dust loads at the same depth setting.
- Use the manufacturer-approved blade for that material. Composite panels and cement board call for a blade rated for the material in front of you.
- Check the collector, not just the hose. A full bag or a clogged filter lets fines escape at the shroud even when extraction is connected.
Exposure isn't marginal. Occupational research on wood dust found 6.0 percent of 252 measurements above 5 mg/m³, and 17.6 percent of measurements involving hardwood or hardwood-softwood mixtures above 3 mg/m³ (wood dust exposure measurements in occupational settings). Experimental work cited in the same paper measured the particulate released during circular sawing, and the readings moved with the material being cut, whether extraction was running, rotational speed, feed rate and tooth count.
For silica-containing sheet goods, the wood-only playbook stops working. Cutting fibre-cement and similar panels with no extraction puts respirable crystalline silica into the air at levels that exceed occupational exposure limits, and no tooth count fixes that. Run on-tool extraction at the dust port, wear a properly fitted respirator, and follow the local exposure controls for the material.
Cleanup matters as much as the cut. Brushing or dry-sweeping a bench re-suspends the fines you just captured, so vacuum the saw, the bench and the floor rather than sweeping them into the air. Extraction near the blade keeps exposure down while the saw is running. A fan in the corner just pushes the fines around the room.
Blade choice and dust control are the two parts of circular saw work where a small change in the setup pays off immediately: the right tooth count for the material, sharp carbide, a thin kerf that eases the motor, and a collector pulling fines at the shroud. EZARC Tools sells a 7-1/4 inch wood cutting blade 2-pack with a 1.5 mm ultra-thin kerf and non-stick coating, priced from $24.97 with a current sale price of $32.50 on the 2-pack. Match the tooth count to the cut you're making today, then give the setup five minutes before the blade meets the good board.