
 Log in


You've blended a weld, but the surrounding metal still looks cloudy. A polishing wheel seems like the obvious next purchase, until you find felt discs, stitched buffs, non-woven wheels and flap discs all promising a better finish.
Before choosing an angle grinder polishing wheel, check whether your grinder can safely drive it with the required guard and mounting hardware. A wheel that produces a beautiful finish on a compatible polishing machine can be completely unsuitable for a fast, fixed-speed grinder. Get that match right first, then work backward from the finish you need.
Table of Contents
- Polishing Wheel Types and What Each One Does
- Speed Rating and Compatibility Check Before You Mount
- How to Mount and Set Up the Wheel Safely
- Technique for a Clean Polish Without Overheating
- Dust, Sparks and Contamination Controls
- Common Problems and How to Fix Them
Polishing Wheel Types and What Each One Does
Grinding removes stock, including weld reinforcement, scale and damaged metal. Polishing refines an already prepared surface, using progressively finer abrasives or a compound carried by a buff.
The distinction matters because a soft wheel won't erase deep grinding scratches efficiently. Conversely, an aggressive flap disc can remove the defect while leaving a scratch pattern that requires considerable finishing.
Polishing wheel types, finishes and compound needs
| Wheel type | Typical construction | Best finish | Compound needed |
|---|---|---|---|
| Sisal or cotton buff | Stitched sisal or cotton layers | Cut-down and colour finish on carbon steel | Yes, bar compound |
| Felt polishing wheel | Pressed wool felt | Fine polish on stainless and non-ferrous metal | Yes, fine compound |
| Non-woven abrasive wheel | Nylon fibres with bonded abrasive | Satin or brushed finish | Usually none |
| Polishing-grade flap disc | Abrasive flaps on fibreglass backing | Blending welds before buffing | None |
Sisal and cotton aren't interchangeable in practice. Stiff sisal suits cut-down work with an appropriate cutting compound. Softer cotton suits the colour-finishing stage, where you're improving clarity rather than levelling substantial defects. Flexible fabric can wrap around an exposed edge, so don't let it catch a corner or pull the tool into a gap.
Felt provides firmer support for compound and gives more controlled contact on prepared metal. That firmness also concentrates pressure, so lingering on a small patch can produce heat quickly. A felt wheel isn't a shortcut around sanding.
Match the wheel to the remaining defect
Non-woven wheels are useful when you want a consistent satin or brushed appearance rather than a mirror. Their conformability helps blend transitions, but repeatedly working an edge can soften its definition. They normally contain their own abrasive, so adding buffing compound usually complicates the process.
Polishing-grade flap discs belong earlier in the sequence. They blend welds and remove preparation scratches, but their abrasive flaps still cut metal. The guide to flap-wheel mesh numbers and polishing requirements helps distinguish abrasive refinement from final buffing.
Selection rule: Choose enough cutting action to remove the defect without creating unnecessary new damage. Then move toward finer abrasives and the appropriate finishing wheel.
For painted components, bare-metal polishing advice doesn't transfer directly. APEX NANO - Titan Coatings' resource on achieving mirror-like gloss on clear coat provides context for that different surface system, not approval to use a metalworking buff on paint.
Make the shop-floor match explicit: identify the metal, name the finish target and confirm the grinder model. Choose a wheel family only when its application and tool compatibility satisfy all those conditions.
Speed Rating and Compatibility Check Before You Mount
The wheel's marked maximum RPM must meet or exceed the speed the grinder can drive it at. A suitable diameter or matching centre hole doesn't establish that the combination is safe.
For applicable bonded abrasive products, EN 12413 defines maximum operating-speed classes of below 16, then 16, 20, 25, 32, 35, 40, 45, 50, 63, 80, 100 and 125 metres per second. The standard addresses construction-related hazards, including centrifugal bursting, but it isn't a universal approval for every fabric buff, felt accessory or coated abrasive sold for polishing.
The distinction between peripheral speed and RPM explains why diameter matters. Peripheral speed measures how quickly the wheel's outside edge travels; RPM measures revolutions. At the same RPM, a larger wheel has a faster-moving rim.
Understand the speed calculation
The conversion is:
Peripheral speed = π × diameter in metres × RPM ÷ 60
Rearranging it gives:
RPM = peripheral speed × 60 ÷ (π × diameter in metres)
These are unit conversions, not substitute product ratings. Use the actual marked diameter and maximum RPM when selecting an accessory.
Maximum RPM by wheel size at an 80 m/s rating
| Wheel diameter | Minimum marked rating |
|---|---|
| 4-1/2 in (115 mm) | 80 m/s or higher, equivalent to approximately 13,300 RPM at the stated metric diameter |
| 5 in (125 mm) | 80 m/s or higher, equivalent to approximately 12,200 RPM at the stated metric diameter |
| 6 in (150 mm) | 80 m/s or higher, equivalent to approximately 10,200 RPM at the stated metric diameter |
The RPM equivalents above are rounded calculations, not permission to exceed a printed limit. Nominal inch sizes and their metric descriptions also aren't exact equivalents. If the wheel label gives a lower RPM than a rounded calculation, the label governs.
Most of all, don't assign that peripheral-speed rating to a polishing wheel that doesn't carry it. A soft buff may require a very different operating range from an abrasive grinding wheel of similar diameter.
Use this visual checklist before comparing finish claims.
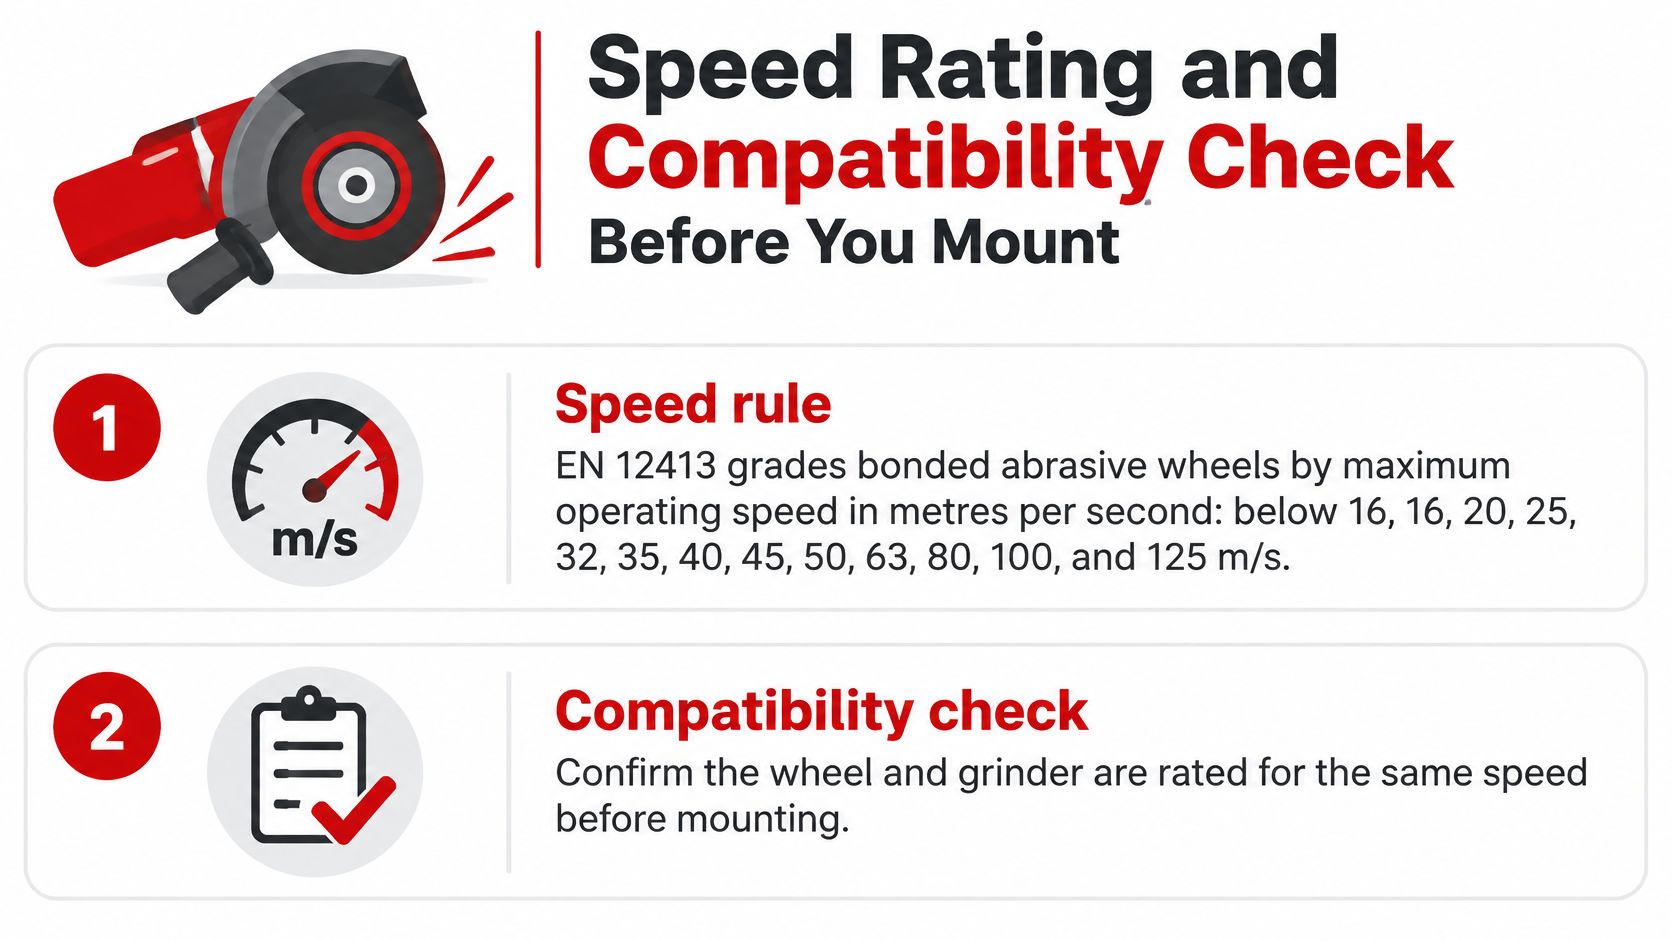
Check the complete combination
OSHA's portable abrasive-wheel guidance says accessories must be specifically designed or recommended for the equipment. It also describes an approximate 5–15-degree working angle for right-angle grinding, which shouldn't be treated as the prescribed angle for every polishing accessory.
Run these checks before buying or mounting:
- Confirm the operation. Choose an accessory approved for the polishing or finishing task. A cutting wheel isn't a polishing wheel, and an abrasive preparation disc isn't automatically a final buff.
- Match the material and finish. Check whether the wheel suits stainless steel, carbon steel or the relevant non-ferrous metal, and whether it produces gloss or a directional texture.
- Compare speed markings. Read the wheel label and grinder nameplate. For variable-speed equipment, use only combinations the manufacturers approve and settings that keep the accessory within its specified range.
- Check mounting geometry. Confirm arbor diameter, spindle thread, backing pad and flange arrangement. A hole that slips over the spindle isn't proof that the flange supports the wheel correctly.
- Verify guarding and handling. Confirm that the required guard fits without interference and that the side handle can remain installed. Don't remove a guard to accommodate an otherwise incompatible wheel.
- Reject damaged accessories. Cracks, chips, warping, damaged mounting holes and unreadable identification are reasons to stop the selection process.
A grinder's speed-control dial also isn't a calibrated tachometer. Don't assume an unmarked dial position makes an incompatible accessory safe, and don't use an improvised electrical speed controller to adapt the tool.
The practical difference between stock removal and surface refinement is explained in this guide to grinding metal. That distinction helps prevent buying an aggressive preparation accessory when the remaining job is improving clarity.
A wheel rated below the grinder's operating speed is replaced with a compatible accessory. It isn't made safe by lighter pressure.
How to Mount and Set Up the Wheel Safely
Mounting deserves the same attention as wheel selection. Oregon OSHA's abrasive-wheel safety guidance states that fragments from a shattered wheel assembly can travel at more than 300 miles per hour, and its safeguarding guidance describes 180-degree guard coverage between the operator and wheel for vertical right-angle grinders.
Start with the grinder isolated, not merely switched off.
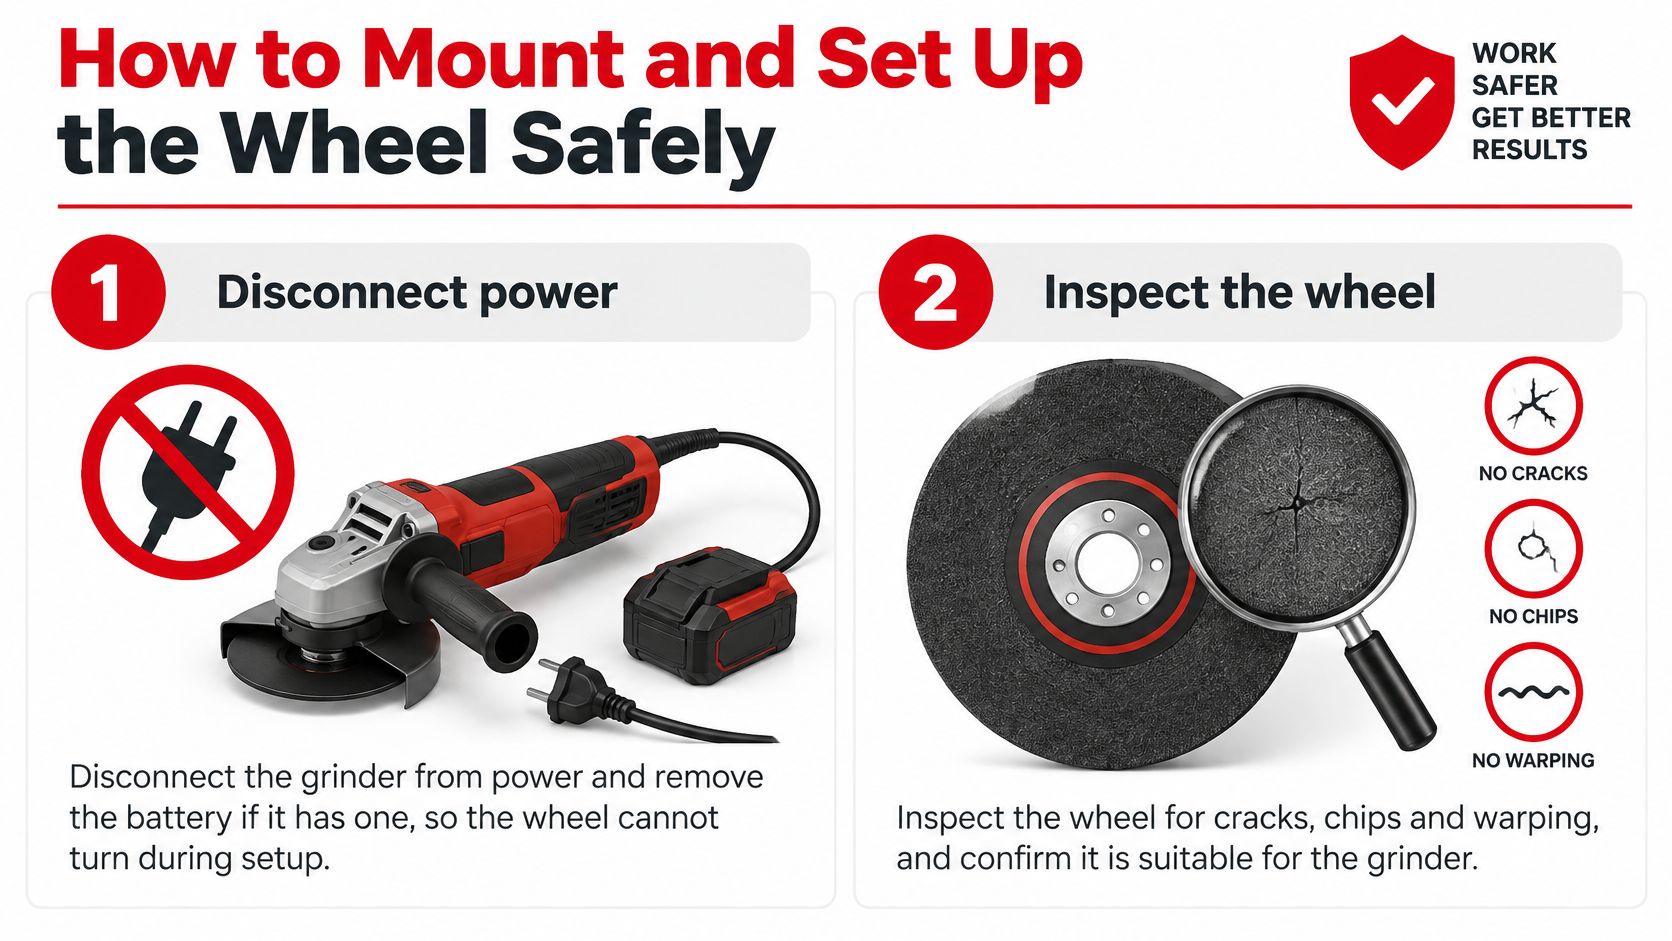
Install without improvising
- Disconnect the power. Unplug a corded grinder or remove the battery from a cordless tool so accidental switch operation can't start it during installation. Set the tool on a stable surface where the spindle and hardware are accessible.
- Inspect the accessory. Examine the face, edge, hub and mounting hole, and confirm that its identification remains legible. Don't install a wheel that has been dropped or damaged unless the manufacturer's inspection procedure establishes that it remains usable.
- Fit the specified support hardware. Use the backing pad, adapter and flange arrangement required for that accessory. Clean the seating surfaces so trapped grit or dried residue doesn't tilt the wheel.
- Secure the assembly correctly. Follow the tool's procedure for the spindle lock and supplied spanner, or the accessory's instructions for a threaded hub. Don't add improvised washers, force an incorrect thread or overtighten the nut to compensate for poor fit.
- Position the approved guard. Keep it between your body and the exposed working area, with the required protection over the spindle end, nut and flange projections. If the accessory fouls the guard, stop and resolve the incompatibility rather than running unguarded.
- Fit the side handle and secure the work. Clamp the component so you don't need a hand to hold it. Establish a balanced stance and use both hands on the grinder, keeping loose clothing, jewellery and hair away from rotating parts.
- Perform the prescribed no-load check. Clear bystanders, stand out of the wheel's plane and follow the manufacturer's test-running procedure at the approved operating setting. Stop immediately for vibration, wobble, rubbing or unusual noise, and isolate the tool before investigating.
Check the setup before contact
A sound installation runs true without rubbing its guard or shifting on the spindle. The handle remains fitted, the workpiece stays secure, and your body isn't directly behind the exposed rotating edge.
Don't press the wheel into the work to suppress a vibration. That hides a mounting or accessory problem while adding load to it.
Use the demonstration as a visual supplement, not a replacement for the instructions supplied with your grinder and wheel.
Technique for a Clean Polish Without Overheating
More speed and more pressure don't automatically produce a faster polish. They can generate heat, smear compound and leave a patchy finish that takes longer to correct than the original scratches.
Start by deciding what still needs removing. Weld scale, coating residue and deep scratches need abrasive preparation; a clean surface with a fine, uniform scratch pattern is ready for refinement.
Prepare before you buff
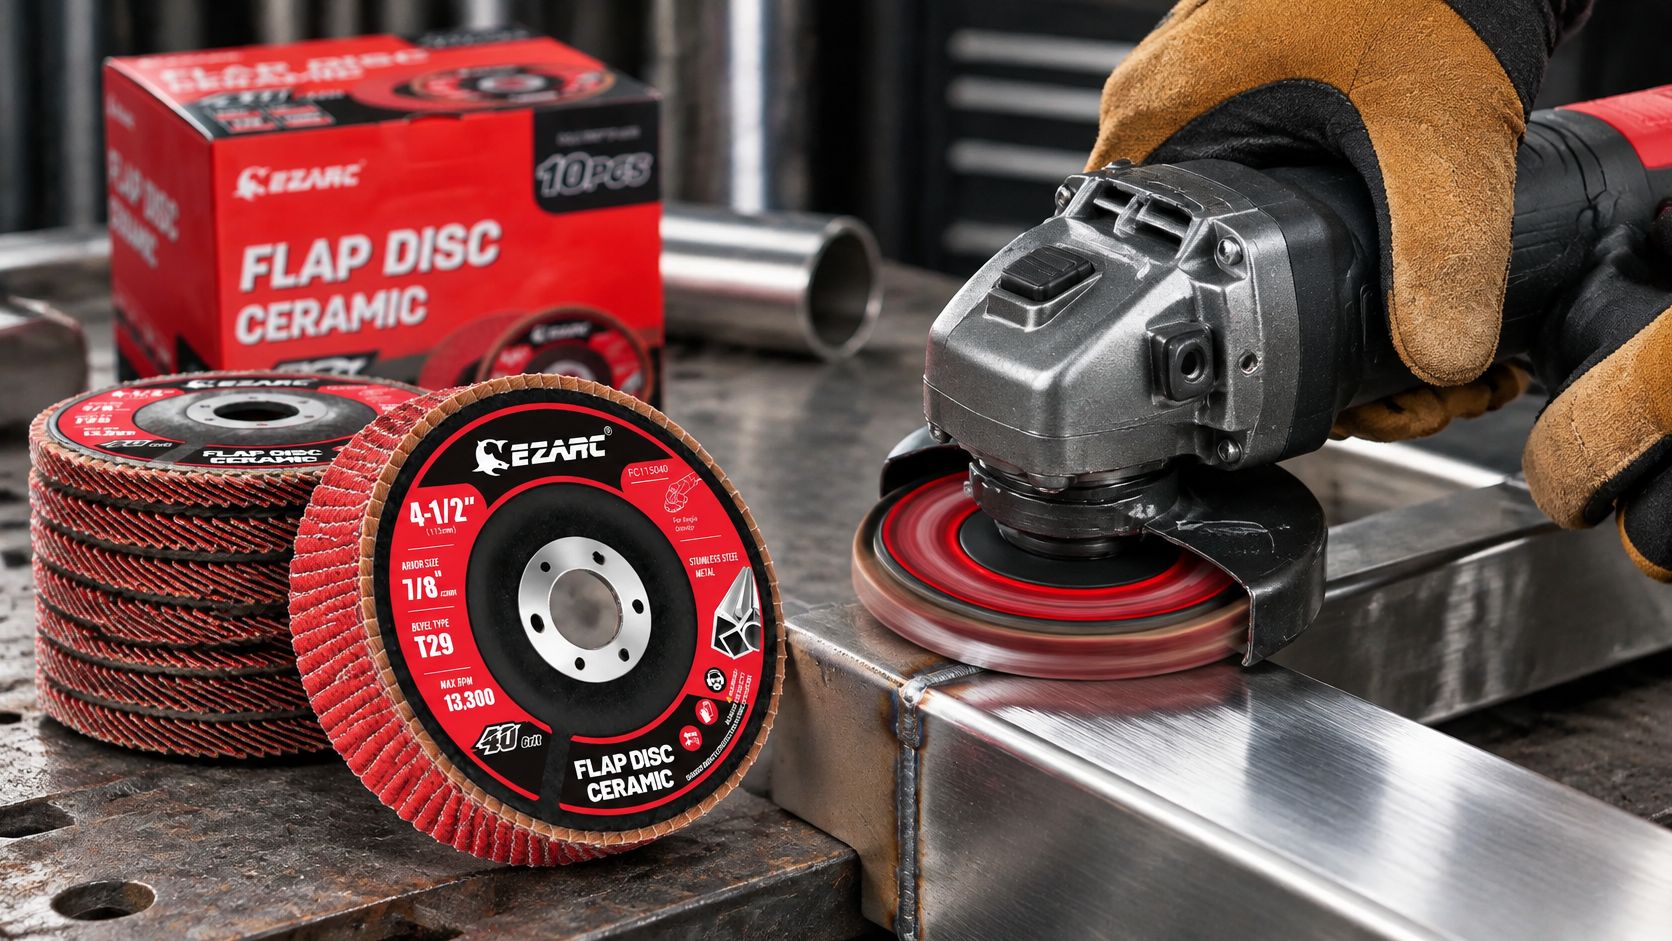
Use an appropriate flap disc or abrasive to level the remaining defects without excavating the surrounding metal. For example, the 4-1/2 In. Ceramic Flap Discs for Stainless Steel,Sheet Metal use ceramic abrasive and a contoured backing for tasks including weld finishing and blending. Treat that kind of accessory as preparation equipment, not as a substitute for a final polishing buff.
The abrasive flap construction is shown below.
Progress to a finer abrasive only after the previous scratch pattern has disappeared. Change the direction of your inspection light or the sanding direction where practical so remaining coarse lines are obvious. This guide to using sanding discs gives useful context for controlling that preparation stage.
- Keep contact light. Let the abrasive cut instead of leaning on the grinder. Excess force makes a small contact patch hotter and can distort the surface.
- Move continuously. Use overlapping passes without parking over a stubborn scratch. Stop and inspect that defect rather than repeatedly heating the same spot.
- Watch the metal. Straw or blue tint on steel means the process needs correction. Don't keep polishing in the hope that fresh gloss will conceal the colour change.
Refine clarity rather than chase scratches
Once the scratch pattern is sufficiently fine, use an approved felt, sisal or cotton accessory with a compound matched to the metal and finishing stage. Apply a modest charge rather than burying the wheel in compound. If coarse scratches remain, return to abrasive preparation.
Paint correction requires a separate tool-and-pad decision. Prime Shine Hand Car Wash's clear-coat-safe swirl removal techniques are useful for understanding that distinction, not for justifying a bare-metal grinding setup on a painted panel.
Inspect the finished part under raking light. You're looking for an even reflection or directional texture, without isolated scratches, cloudy patches or heat-related colour changes.
Dust, Sparks and Contamination Controls
A brighter surface isn't worth uncontrolled exposure. OSHA's angle-grinder safety guidance identifies respirable dust, flying particles, noise and fire from heat and sparks as hazards, and warns against operating angle grinders where combustible dust may accumulate.
Set up the job so you control residue before it spreads through the workshop. The residue may include metal, abrasive, compound and whatever coating was on the component.
Control the workspace before personal exposure
- Remove fire hazards. Clear combustible material from the discharge path and check nearby crevices where hot particles could collect. Don't assume a finishing operation is spark-free.
- Capture residue appropriately. Use local extraction or ventilation suited to the material and process. An ordinary workshop vacuum isn't automatically suitable for hot particles or combustible metal dust.
- Protect your eyes and face. Wear suitable eye protection with a face shield for flying debris. A face shield doesn't replace safety glasses.
- Address noise and breathing hazards. Select hearing protection for the exposure and respiratory protection where the assessment or local requirements call for it. Match respiratory protection to the actual dust or coating hazard.
Dry polishing is straightforward to arrange, but it releases residue and requires careful heat management. A purpose-designed wet-compatible process can reduce airborne residue and improve cooling, but only when the tool, accessory and workpiece are approved for that method. Never spray water onto a running conventional electric grinder or its wheel.
Keep finishing media segregated
Dedicate wheels to stainless steel, aluminium, ferrous metals and painted surfaces. Keep finishing compounds separate too, because a coarse abrasive particle trapped in a fine buff can reintroduce scratches.
Clean between grades using a surface-compatible cleaner and a clean cloth. If you use a solvent, follow its handling requirements and allow flammable vapour to clear before restarting.
Finish quality includes what you don't see: embedded contamination, rounded geometry and thermal damage can matter more than gloss.
Choose another process when freehand polishing can't preserve a critical dimension, meet a corrosion-sensitive finishing specification or keep a heat-sensitive part within its requirements. Controlled finishing may involve dedicated machinery, different abrasives or specified post-treatment. A bright appearance alone doesn't establish that a part is ready for service.
Common Problems and How to Fix Them
Burn marks are a reason to change technique, not add more compound. Reduce the heat input before trying to recover the appearance, and assess whether the discolouration or damage requires more than cosmetic correction.
Use the symptoms below to choose between a process adjustment and an immediate stop. These are likely causes, not proof that the wheel or tool is otherwise sound.
Polishing symptoms, causes and fixes
| Symptom | Likely cause | Fix |
|---|---|---|
| Burn marks or blue tint | Too much pressure or dwell | Use lighter passes and keep the wheel moving |
| Wheel grabs or kicks back | Steep contact angle, exposed edge or overly aggressive wheel | Stop, reassess the approach, use the accessory's specified angle and maintain a firm side-handle grip |
| Swirl marks that will not polish out | A grit stage was skipped | Step back to a suitable abrasive grade and remove the previous scratch pattern |
| Compound caking, no gloss | Wheel overloaded with compound | Clean or dress only as the manufacturer permits, or replace the wheel, then apply less compound |
| Vibration or wobble | Loose, unbalanced or damaged wheel | Stop, isolate power, check the mount and flange, and replace damaged components |
Separate stop conditions from finish corrections
Vibration and grabbing require an immediate pause. Disconnect the tool and check the hardware, accessory condition and workholding before another attempt. Don't tighten the nut harder or brace yourself against repeated kickback.
If a buff has become contaminated or heavily glazed, replacement may be safer and more effective than trying to restore it. Never hold an improvised dressing tool against a handheld grinder's spinning buff.
Scratch-related problems need a different response. Inspect a small cleaned area under angled light, identify the deepest remaining marks, and select an abrasive capable of removing them without unnecessary stock loss.
Correct the cause before continuing
Make a controlled test on scrap of the same material, or on an inconspicuous area where appropriate. Change pressure, abrasive grade or compound loading deliberately rather than changing everything at once. That makes it easier to judge whether you've solved the problem.
Don't confuse leftover compound with an unfinished surface. Wipe the part clean before deciding that it needs more buffing, and don't chase a mirror finish if the required result is a uniform satin texture.
A cracked, chipped or warped wheel is discarded, not repaired. No improvement in shine compensates for an accessory that can't run safely.
EZARC Tools offers sanding and polishing accessories, including stripping discs for paint and rust removal and flap sanding discs for stainless steel and sheet metal. Visit EZARC Tools to compare accessories for your preparation stage, then verify the wheel's speed marking, mounting arrangement and guard compatibility against your grinder before ordering.