 Oscillating Multi-Tool Blades
 Reciprocating Saw Blades
 Cutting & Grinding
 Hole Saw
 Drilling
 Sanding & Polishing
 Hand Tools
 Metal Worker & Fabrication
 Woodworking & Carpentry
 Electrical & Plumbing
 Automotive
 Concrete & Masonry
 Demolition
 NEW ARRIVALS
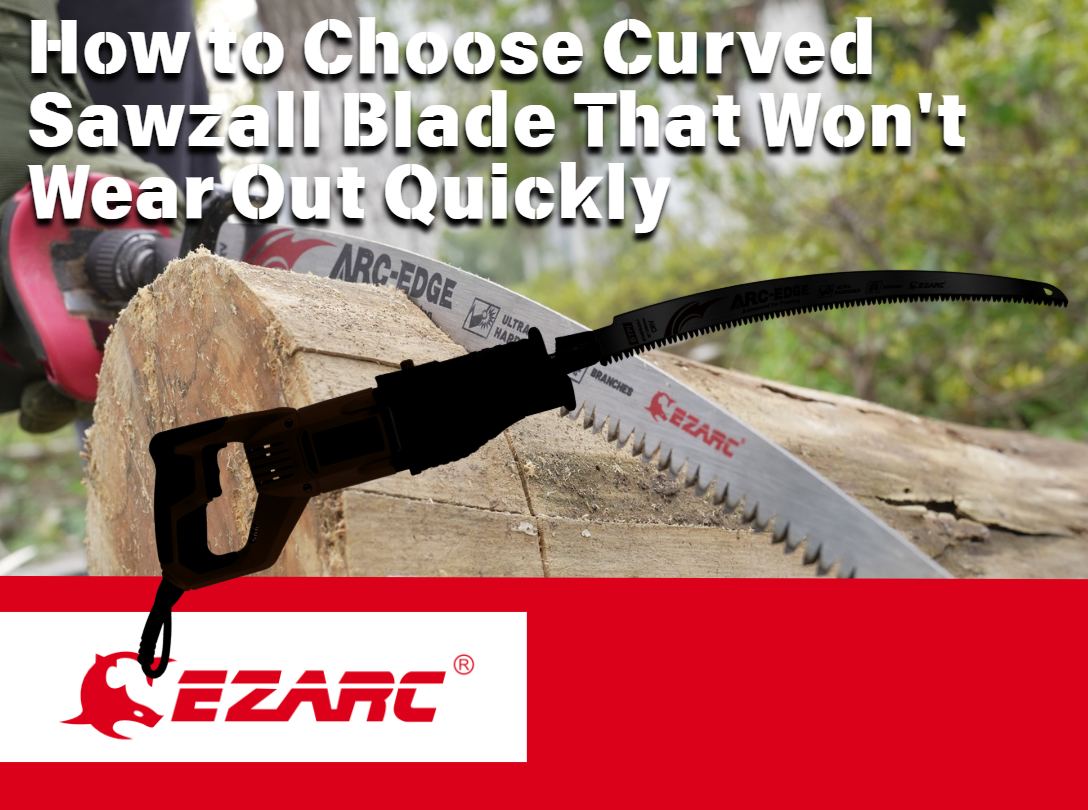
Introduction
A curved Sawzall blade can be a total problem-solver—until it isn’t. If your Reciprocating Saw Blades keep dulling after a few cuts, it’s usually not “bad luck” or a weak saw. In real pruning and demo work, fast wear is most often caused by a mismatch between the blade’s tooth geometry (TPI and gullet size), the steel/tooth material, and the way the blade is being loaded in the cut (binding, twisting, or overheating).
The good news is that you can dramatically slow wear by choosing a curved blade that’s engineered for the material you’re cutting—especially when you’re dealing with wet/green wood, overhead limbs, or nail-embedded lumber. In this guide, you’ll learn how to evaluate curve shape, tooth grind, gullet depth, and steel/tooth construction so your blade stays sharper longer and cuts straighter with less vibration.
Below, the steps use EZARC’s professional Reciprocating Saw Blades as practical examples because they highlight the key design choices that matter most for longevity: aggressive fleam-ground teeth and deep gullets for pruning, and carbide-tooth construction for mixed materials.
How to Choose Curved Sawzall Blade Step by Step
Step 1: Confirm material and moisture
Before you choose any curved blade, decide what you’re actually cutting—not what you think you’re cutting. For pruning, “wood” can mean dry, seasoned branches, or it can mean green limbs full of sap and moisture. Green wood tends to produce stringy chips that pack the kerf and increase friction. That friction creates heat, and heat accelerates edge rounding, glazing, and tooth dulling.
Start by checking moisture and density. If the limb feels heavy for its size, looks freshly cut, or produces wet sawdust strands, treat it as green wood and prioritize a coarse, chip-clearing blade. If you’re working around fences, old tree hardware, or reclaimed lumber, assume hidden grit or metal. In those cases, the biggest wear driver is tooth chipping from impacts—not normal abrasion—so you’ll want a blade designed to survive surprises.
A simple rule: if you can’t confidently rule out nails or screws, don’t “gamble” with a standard pruning blade. Choose a tougher tooth material (like carbide) and slow your feed rate so impacts don’t strip teeth.
Step 2: Choose curve for reach control
The curve is not just a shape preference—it changes how the blade contacts the work. A curved profile can help you keep more teeth engaged while pruning, especially when you’re cutting round limbs at awkward angles. That matters because better contact stability reduces chatter, and less chatter reduces micro-chipping at the tooth tips.
For overhead pruning and reach-in cuts, look for an arc edge that naturally “bites” as you pull the saw toward yourself. The goal is to reduce side-loading. When a blade is forced sideways in the kerf—common when you’re stretching to reach a limb—the teeth wear unevenly and the blade dulls early on one edge, causing drift.
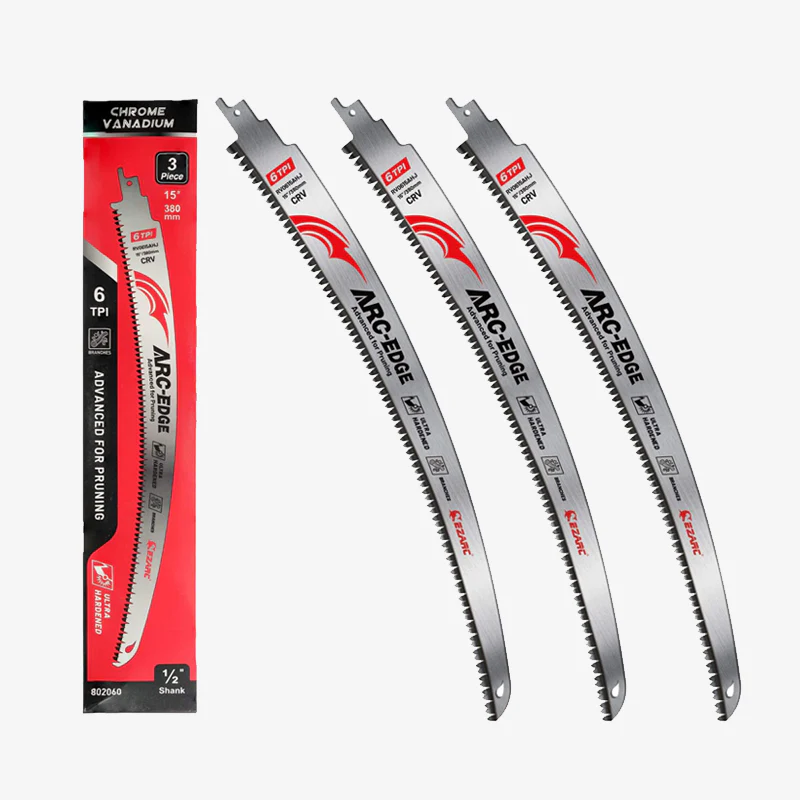
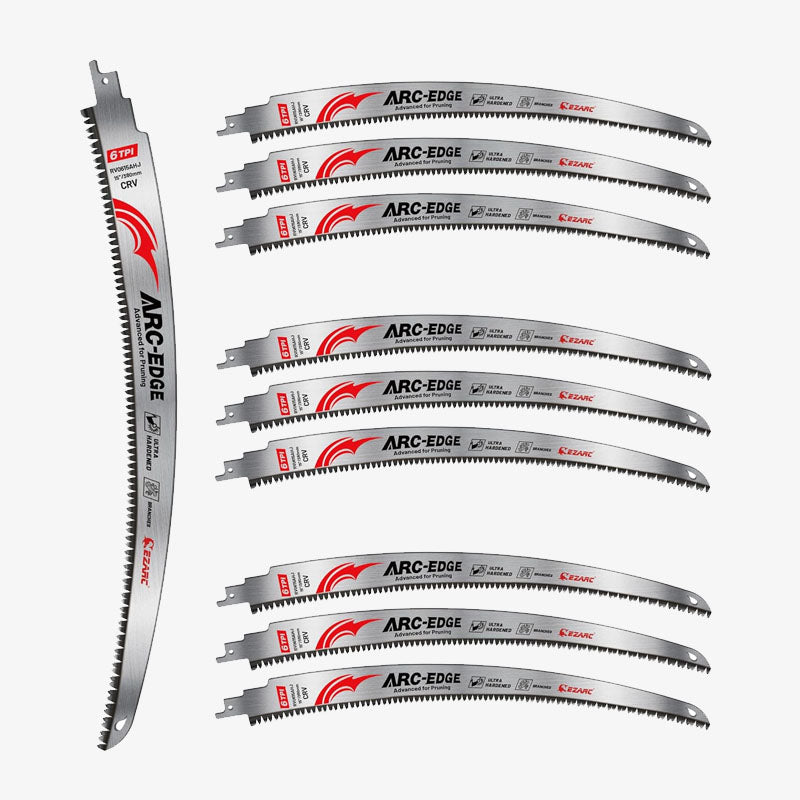
EZARC’s Tree Trimming/Wood Cutting – Japanese Teeth 6 TPI Reciprocating Saw Blade uses an arc edge design meant to improve leverage and control in pruning-style cuts, helping you stay aligned instead of twisting the blade to finish the cut.
Step 3: Match TPI to cut aggressiveness
Teeth per inch (TPI) is one of the fastest ways to predict whether a blade will wear out early. Too fine (high TPI) in green wood creates heat because the gullets are small and chips can’t clear. Too coarse (low TPI) in thin stock can snag, vibrate, and chip teeth.
For pruning and wet limbs, lower TPI is typically the durability move because it keeps the blade cooler and clears chips faster. A coarse blade also needs less pushing force, and lower force means less bending and less rubbing. In practice, you’re trying to keep the teeth cutting instead of polishing the wood.
EZARC’s pruning blade is a 6 TPI design intended for coarse wood cutting where chip evacuation matters. If your current curved blade dulls quickly in wet branches, moving to a lower TPI profile with deeper gullets is often the single biggest improvement you can make.
Step 4: Prioritize tooth grind and gullets
Tooth grind controls how efficiently each tooth slices fibers—and gullets control how efficiently the blade removes waste. If either is wrong, wear accelerates because friction rises.
For pruning-style cuts, look for sharp, aggressive grinds and noticeably deep gullets. Deep gullets reduce packing (especially in green wood) and keep the kerf open so the blade doesn’t bind. Binding forces you to push harder, and pushing harder increases heat and torsional stress—two of the most common “blade killers.”
EZARC highlights aggressive fleam-ground teeth paired with deep gullets on its Japanese-teeth pruning blade. That combination is designed to evacuate chips faster and reduce heat buildup, which is exactly what you want when you’re cutting wet limbs that otherwise gum up a standard wood blade.
Step 5: Select steel for longer sharpness
Even with the right geometry, the base material still matters. Steel choice impacts flexibility, rust resistance, and how well the tooth edge holds up under heat and vibration.
For outdoor pruning, corrosion is not a minor detail. Sap, moisture, and storage humidity can pit teeth, and micro-pitting makes edges wear faster once you start cutting again. A steel that resists rust and holds its finish tends to maintain performance longer between jobs.
EZARC’s pruning blade is described as heavy-duty Chrome Vanadium (Cr-V) polished steel, positioned for durability and rust resistance in pruning and yard work. In practical terms, that makes it a good fit when your blades are regularly exposed to wet branches, storm cleanup, or you keep tools in a garage where humidity swings seasonally.
Step 6: Upgrade for nail-embedded cuts
If you’re cutting anything that may hide nails, screws, bolts, cast iron, stainless, or even gritty demolition lumber, tooth material becomes the main durability factor. Standard wood teeth can strip instantly on metal contact, and bi-metal blades can still lose edge rapidly in repeated impacts.
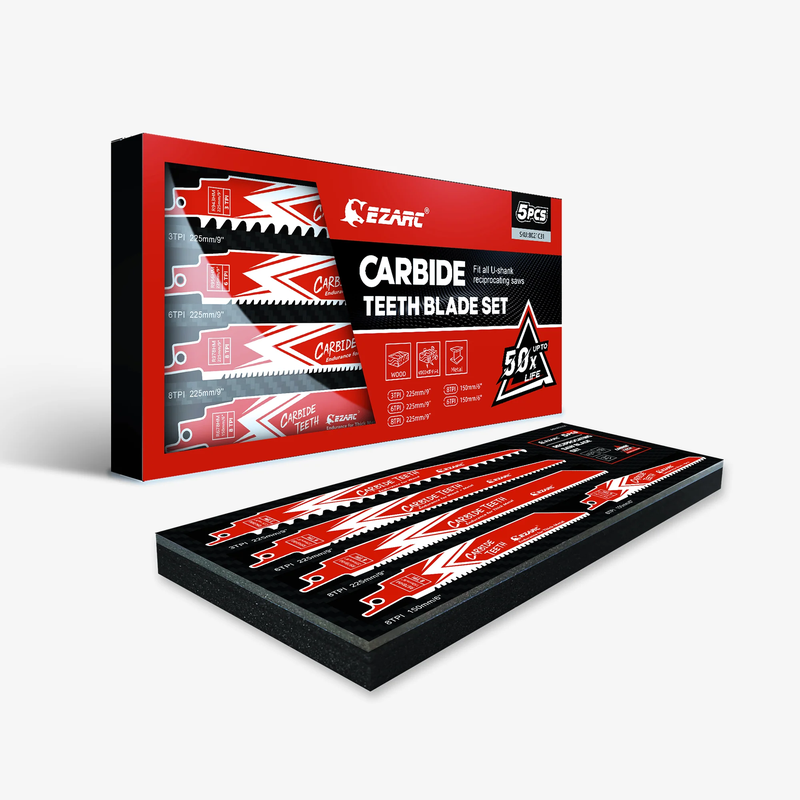
A carbide-tooth blade is usually the “wear-out prevention” choice in mixed materials because carbide resists abrasion and heat far better than typical steel teeth. EZARC’s Multi-Material Cutting – Carbide Reciprocating Saw Blade Set is designed with carbide teeth welded to a flexible steel body, and it includes multiple TPI options (3 TPI, 6 TPI, and 8 TPI) and sizes (6-inch and 9-inch) so you can match the cut rather than forcing one blade to do everything.
Use coarse options when you need speed and chip clearance (thicker material), and move finer when you need control and a cleaner finish. The point is to keep cutting forces stable and avoid the tooth shock that causes chipping.
Step 7: Reduce wear with correct technique
Even the best curved blade will die early if technique creates heat and side-load. The most wear-friendly technique is the one that keeps the blade straight, cool, and supported.
First, let the saw reach full speed before contacting the wood or metal. Then keep steady, moderate pressure—enough that chips are coming out consistently, but not so much that the tool bogs. If chips stop flowing or sawdust turns very fine and dusty, you’re rubbing instead of cutting, which overheats teeth.
Second, avoid twisting to “finish” a cut. If the kerf closes, stop and reposition, or add a small relief cut so the blade can move freely. Third, use the shoe (the saw’s front plate) as a brace whenever possible. Bracing reduces vibration at the blade, and lower vibration means less micro-chipping and slower edge breakdown.
Finally, store blades dry and keep pruning blades separate from demolition blades. Mixing them in a bin can dull teeth through contact, and that wear happens before you even start cutting.
Scenario Variations
Storm cleanup (wet limbs, fast clearing): Treat almost everything as green wood and prioritize chip evacuation. A curved 6 TPI pruning blade with deep gullets helps prevent the heat and binding you get when wet fibers pack the kerf. Make shorter cuts and clear chips frequently to avoid glazing.
Overhead pruning (long reach, awkward angles): Curve matters more here because side-loading is common. Choose an arc edge blade long enough to reach, then brace the saw shoe whenever possible to reduce vibration. If you feel the blade flex, back off and change your stance rather than forcing the cut.
Demo remodel (nails, mixed materials): Skip standard wood teeth and go straight to carbide-tooth Reciprocating Saw Blades. Use a coarser TPI for thick sections, and slow down before breaking through into areas where nails are likely.
Tight access (shorter control): In cramped areas, blade control beats length. Pick a shorter blade length (often 6-inch) to reduce flex, and use a steadier feed rate to keep the blade from chattering. If you must cut close to fasteners, assume impacts and use carbide.
Prerequisites and Safety
Required Tools and Materials
You’ll get better blade life if the whole setup is stable and consistent. Bring a reciprocating saw with a solid shoe and a fully charged battery (low power increases bogging and heat). Use a clamp, strap, or support line to prevent the branch from pinching the kerf as it drops. Keep a marker or chalk for cut planning, and have at least one backup blade so you don’t keep forcing a dull one. Gloves help with grip and vibration, and a small brush is useful for clearing packed wet chips from the blade between cuts.
If you’re building out a general cutting kit beyond pruning, organize your work area so you can quickly switch between Reciprocating Saw Blades and related categories like Oscillating Multi-Tool Blades, Cutting and Grinding Discs, Hole Saw Kits, Drill Bits and Sets, Sanding and Polishing Abrasives, Socket and Driver Sets, and Hand Tools. The main goal is to match the tool to the task instead of abusing one blade on every material. (https://www.thisoldhouse.com/walls/reciprocating-saw-101-how-to-use-the-shoe)
Safety Considerations
Eye protection is non-negotiable when cutting, pruning, or demolishing. Flying chips and metal fragments are common, and OSHA requires eye and face protection to comply with ANSI/ISEA Z87.1 in construction settings. (osha.gov)
Before swapping blades, remove the battery or unplug the saw so an accidental trigger pull can’t start the tool. Keep hands away from the cut line, and never reach under a branch that’s partially cut and under tension. Avoid twisting the blade in the kerf; if the blade binds, stop immediately and reposition the work. For overhead pruning, maintain stable footing and keep the saw path clear so you don’t lose balance as the branch drops.
Troubleshooting
| Problem | Likely Cause | Solution |
| Blade dulls quickly in green wood | TPI too high; gullets too shallow; overheating from rubbing | Switch to a lower TPI pruning blade with deeper gullets, reduce pressure, and cut in short bursts so chips clear and the blade stays cooler. |
| Blade binds halfway through a limb | Kerf closing due to branch weight or internal tension; side-loading | Support the branch near the cut, keep the saw shoe braced, and add a small relief cut to prevent pinch. Back out and restart at full speed if binding begins. |
| Teeth chip or strip unexpectedly | Hidden nails/screws/grit; forcing the cut at breakthrough | Upgrade to carbide-tooth Reciprocating Saw Blades for mixed materials, slow down near the last 1 inch of the cut, and inspect the work area for hardware first. |
| Cut drifts off line | Blade flex from too much reach; twisting to correct mid-cut | Use a shorter blade where possible, reduce feed pressure, and stop to reposition rather than steering aggressively. Ensure the shoe stays in contact with the work. |
| Blade gets hot and discolors | Excess friction from dull teeth, packed chips, or high pressure | Let the blade cool, clear chips, and replace the blade if teeth are rounded. Aim for continuous chip flow instead of dusty powder. |
FAQ
Does a curved blade last longer than a straight one?
A curved blade can last longer when it reduces binding and side-loading, because both issues accelerate heat and uneven tooth wear. The curve helps keep more teeth engaged on round limbs, which stabilizes the cut and lowers chatter. However, if the curve causes you to pry or twist the blade in tight spaces, it can wear faster than a straight blade. The durability advantage comes from better control, not from the curve alone.
What TPI is best for pruning so the blade doesn’t wear out fast?
For pruning—especially green or wet wood—lower TPI is usually the better durability choice because it clears chips faster and runs cooler. When chips evacuate cleanly, the teeth stay cutting instead of rubbing and overheating. If your sawdust looks powdery and the blade feels hot, the TPI is likely too high or you’re pushing too hard. A coarse pruning blade is typically the most forgiving option for branches and storm debris.
What should I do if my blade keeps binding in thick branches?
Binding often happens because the kerf closes as the branch sags or because the blade is being twisted in the cut. Support the branch on both sides of the cut with a strap, clamp, or helper line so it can’t pinch the blade as it drops. Keep the saw shoe pressed firmly against the wood to reduce vibration and flex. If binding starts, stop immediately, back the blade out slightly, let it return to full speed, and continue with lighter pressure.
How do I know when a reciprocating saw blade is too dull to keep using?
A blade is effectively “done” when it stops producing consistent chips and starts creating heat, smoke, or burn marks. You may also notice the saw bogging, increased vibration, and the cut wandering even when you hold steady. Visually, the tooth tips look rounded or polished instead of sharp and defined. Continuing with a dull blade usually damages the blade further and increases kickback risk, so replacing it is the safer move.
Conclusion
Choosing a curved Sawzall blade that won’t wear out quickly comes down to matching design to reality: moisture level, hidden metal risk, and how you’ll actually hold the saw on the job. Prioritize chip clearance (TPI and gullets), stable cutting (curve for reach and control), and the right tooth material—especially carbide when nails are possible. Then protect your investment with technique: brace the shoe, avoid twisting, and keep cuts cool and controlled.
If you build your kit around the right Reciprocating Saw Blades for each scenario, you’ll spend less time fighting binding and swapping dull blades—and more time finishing clean cuts with confidence.

Table of Contents
- Introduction
- How to Choose Curved Sawzall Blade Step by StepStep 1: Confirm material and moistureStep 2: Choose curve for reach controlStep 3: Match TPI to cut aggressivenessStep 4: Prioritize tooth grind and gulletsStep 5: Select steel for longer sharpnessStep 6: Upgrade for nail-embedded cutsStep 7: Reduce wear with correct technique
- Scenario Variations
- Prerequisites and SafetyRequired Tools and MaterialsSafety Considerations
- Troubleshooting
- FAQDoes a curved blade last longer than a straight one?What TPI is best for pruning so the blade doesn’t wear out fast?What should I do if my blade keeps binding in thick branches?How do I know when a reciprocating saw blade is too dull to keep using?
- Conclusion

Laisser un commentaire
Ce site est protégé par hCaptcha, et la Politique de confidentialité et les Conditions de service de hCaptcha s’appliquent.